
You can connect your Course.link website to Google Sheets using webhooks and Zapier. This allows you to automatically store user registration and course purchase details in a Google Sheet without any manual work.
For example, when John registers for your academy or purchases a course, Course.link can send his details through a webhook. Zapier catches that data and automatically adds a new row in your Google Sheet with John’s name, email, course name, and other details.
This way, all your student data is organized in one spreadsheet and updated automatically.
In this guide, we’ll walk you through setting up this connection step by step.
Note
Make sure you have a Zapier account account before starting.
Set Up Your Webhook in Zapier
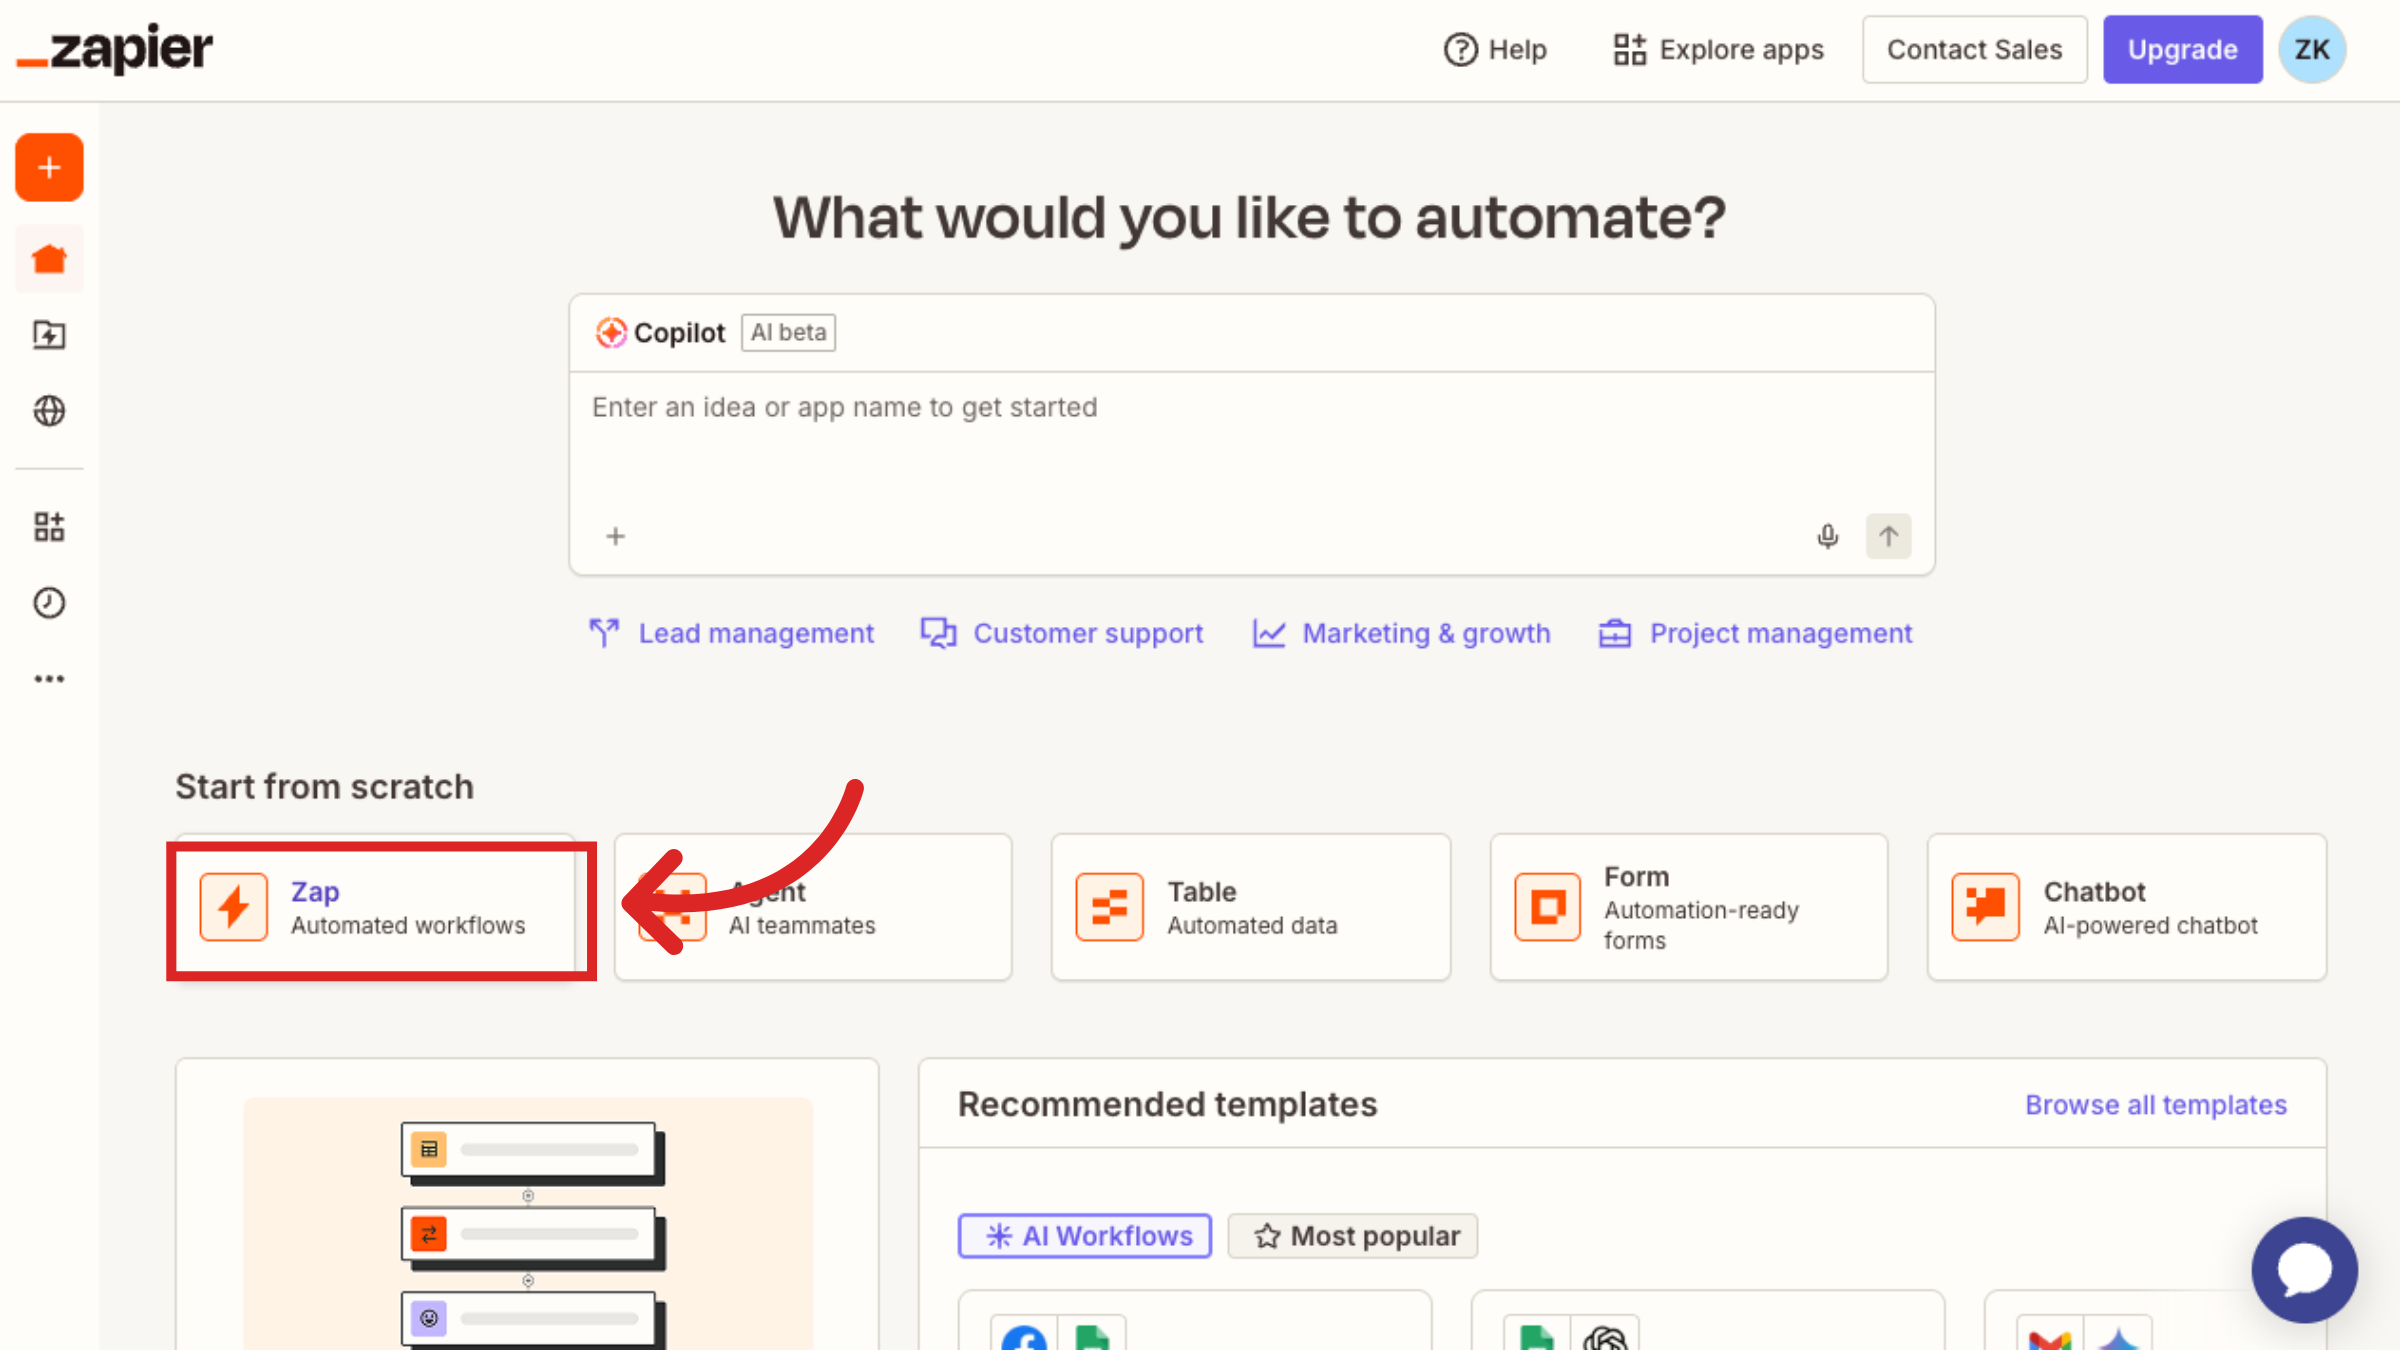
Log in to your Zapier dashboard and click on Zap.
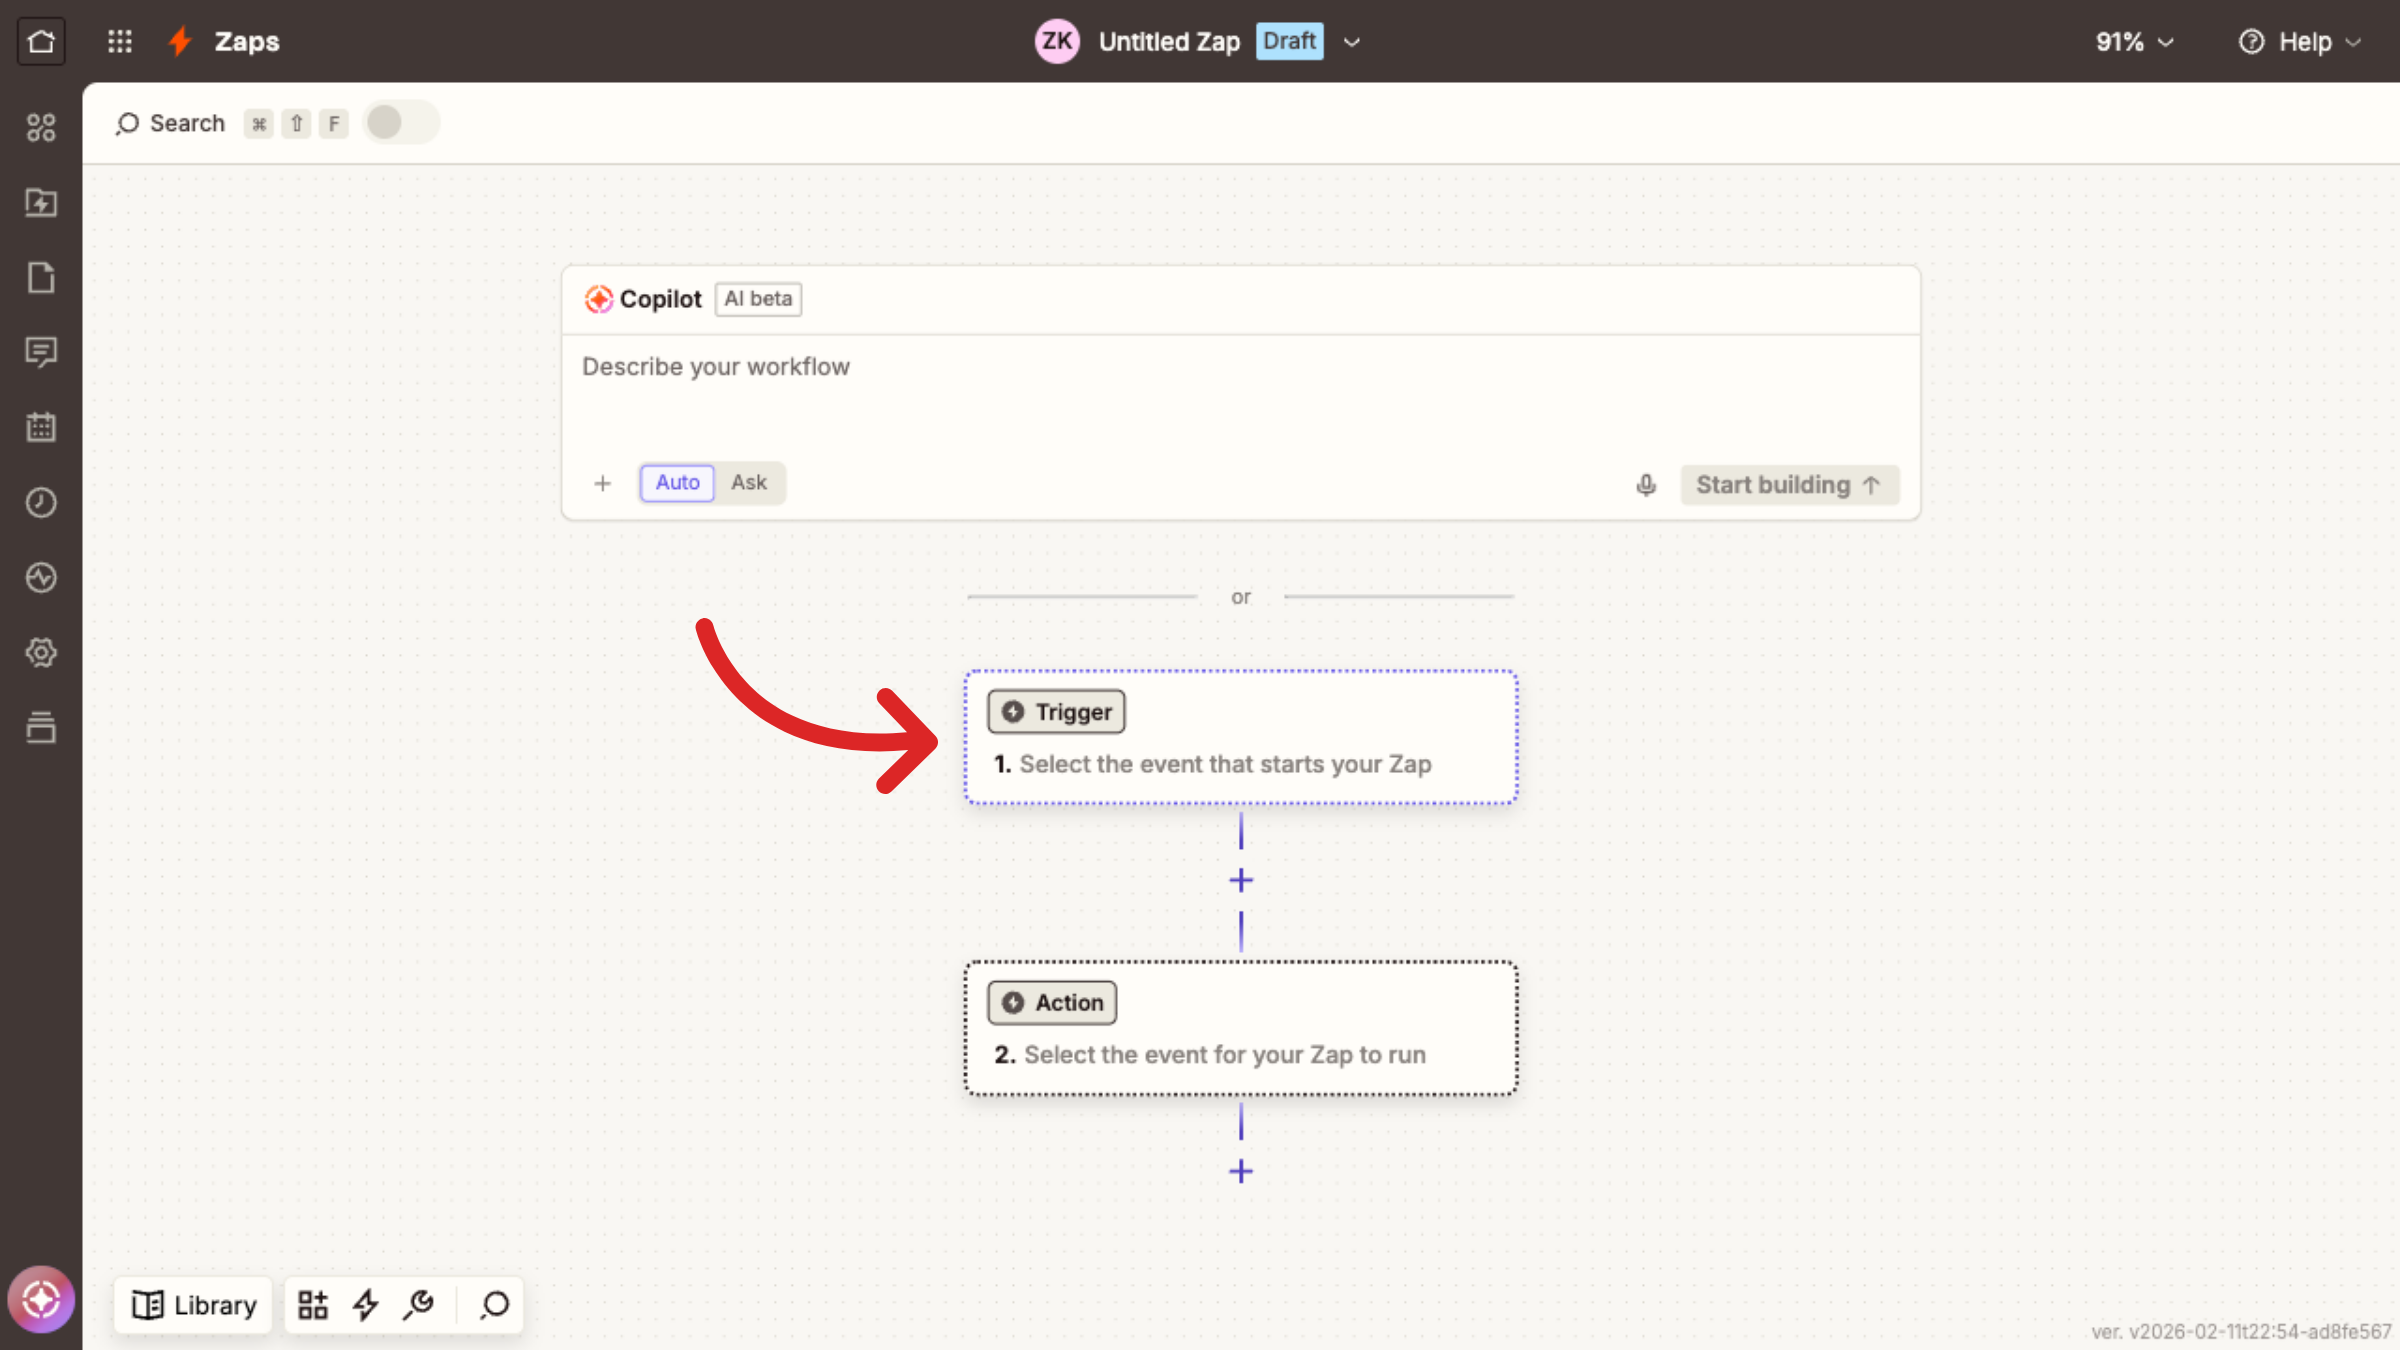
Then in the editor select the Trigger option.
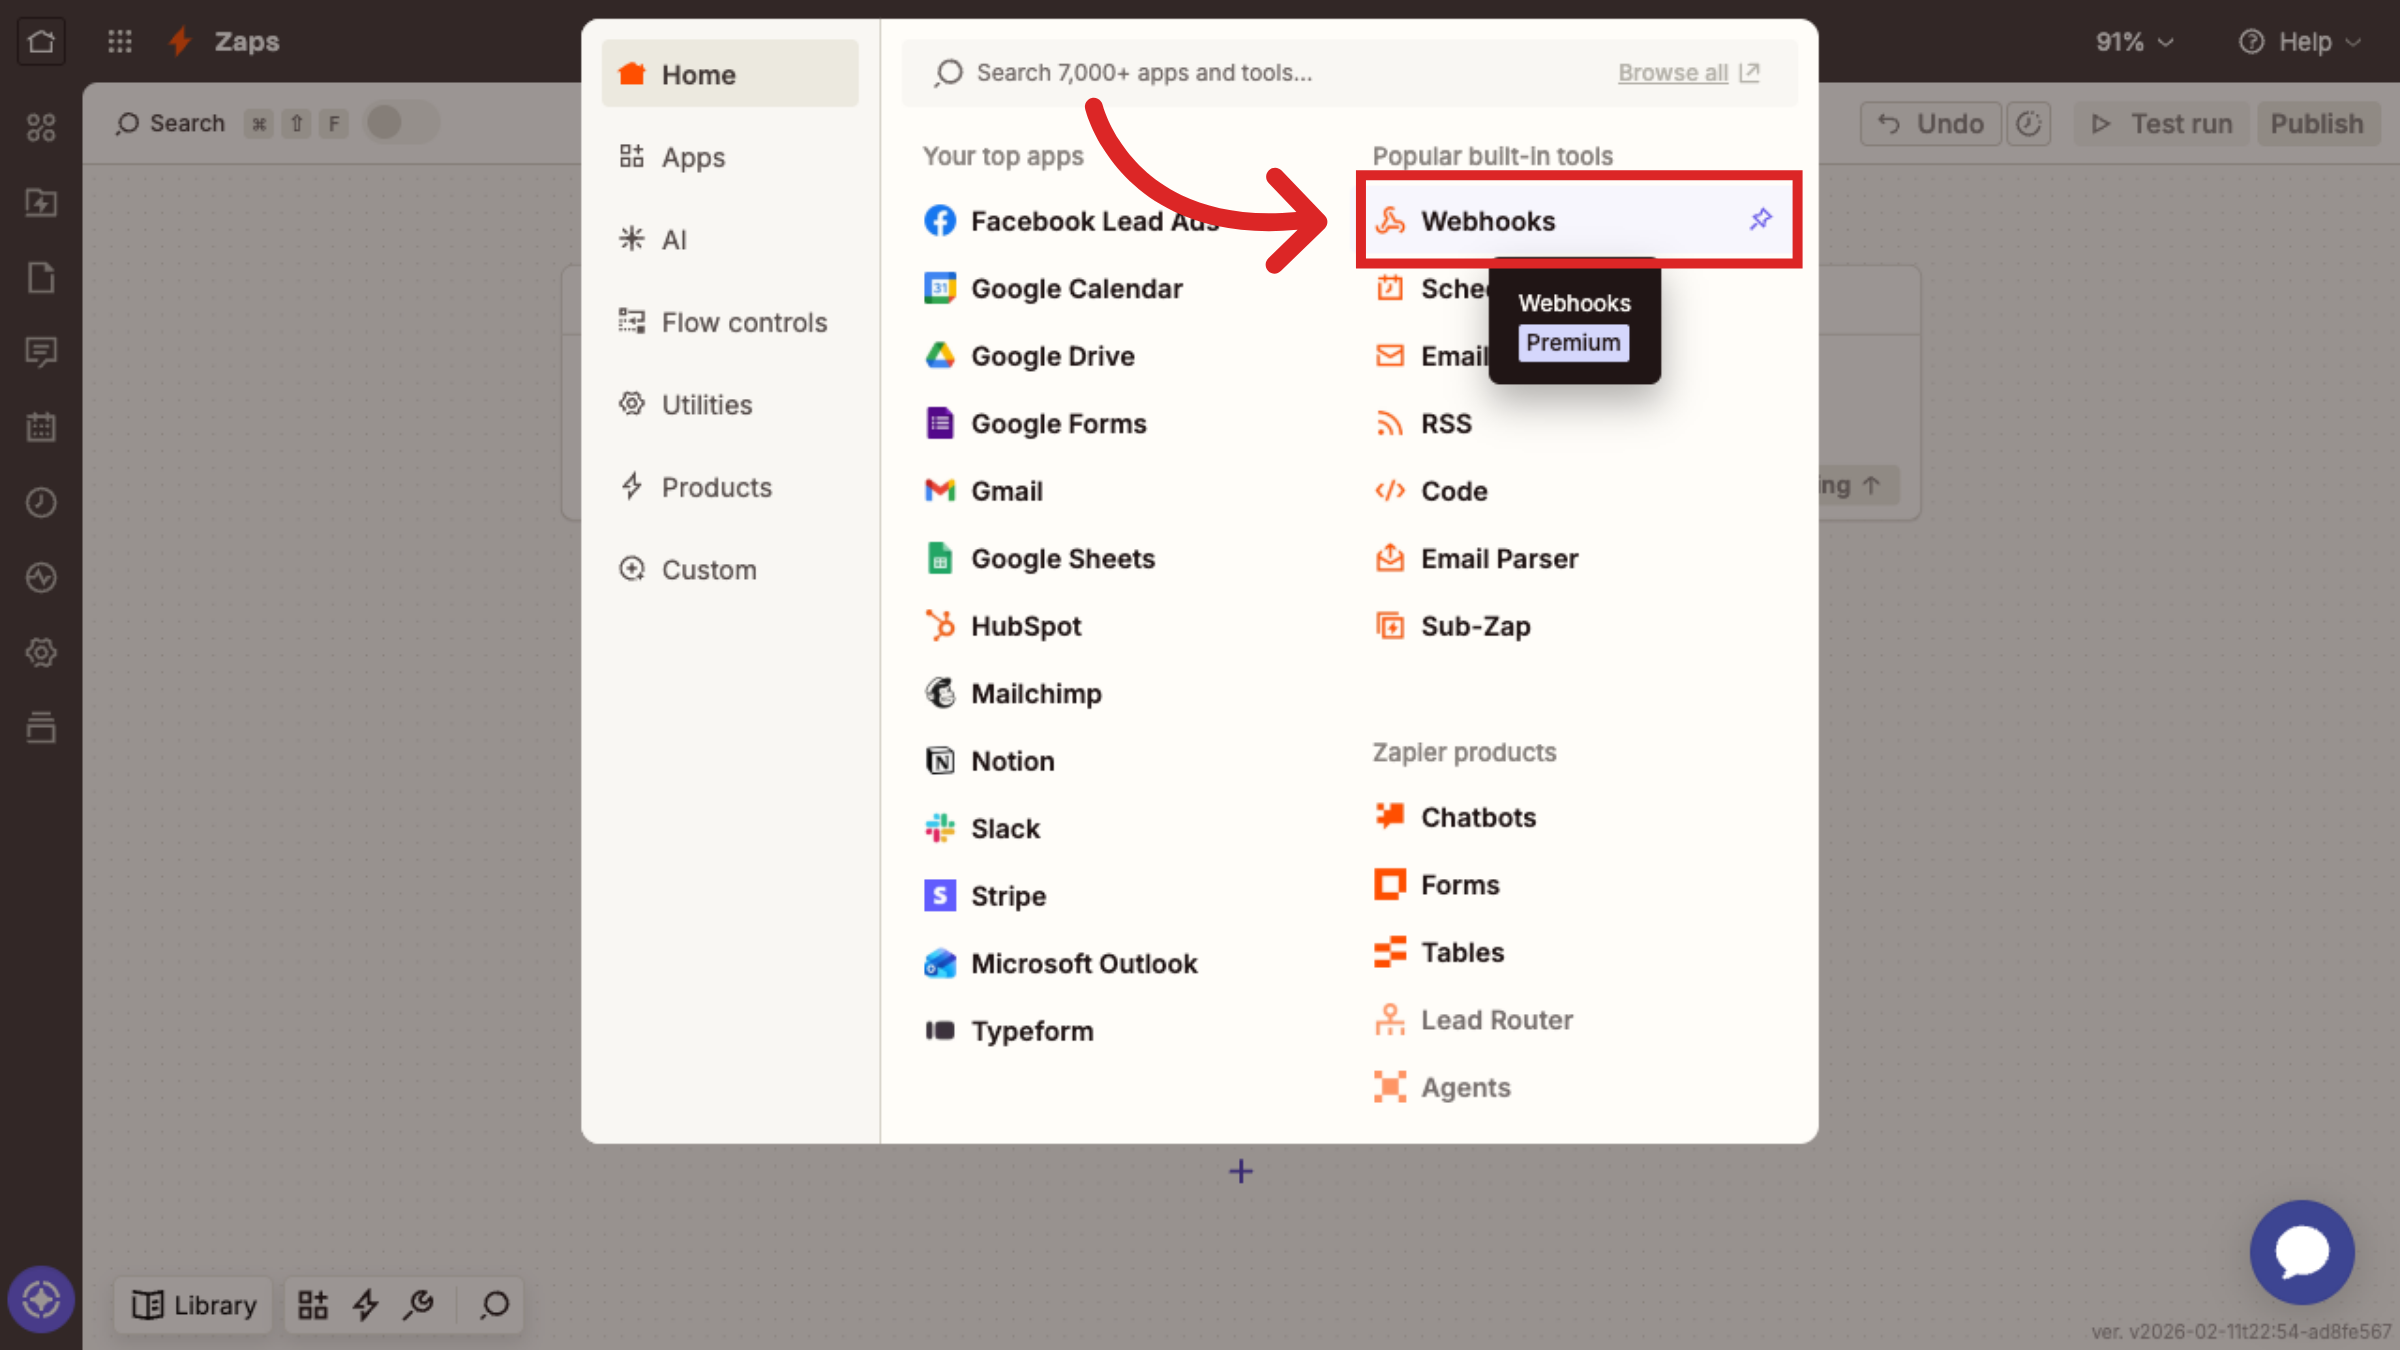
Select Webhooks from the list.
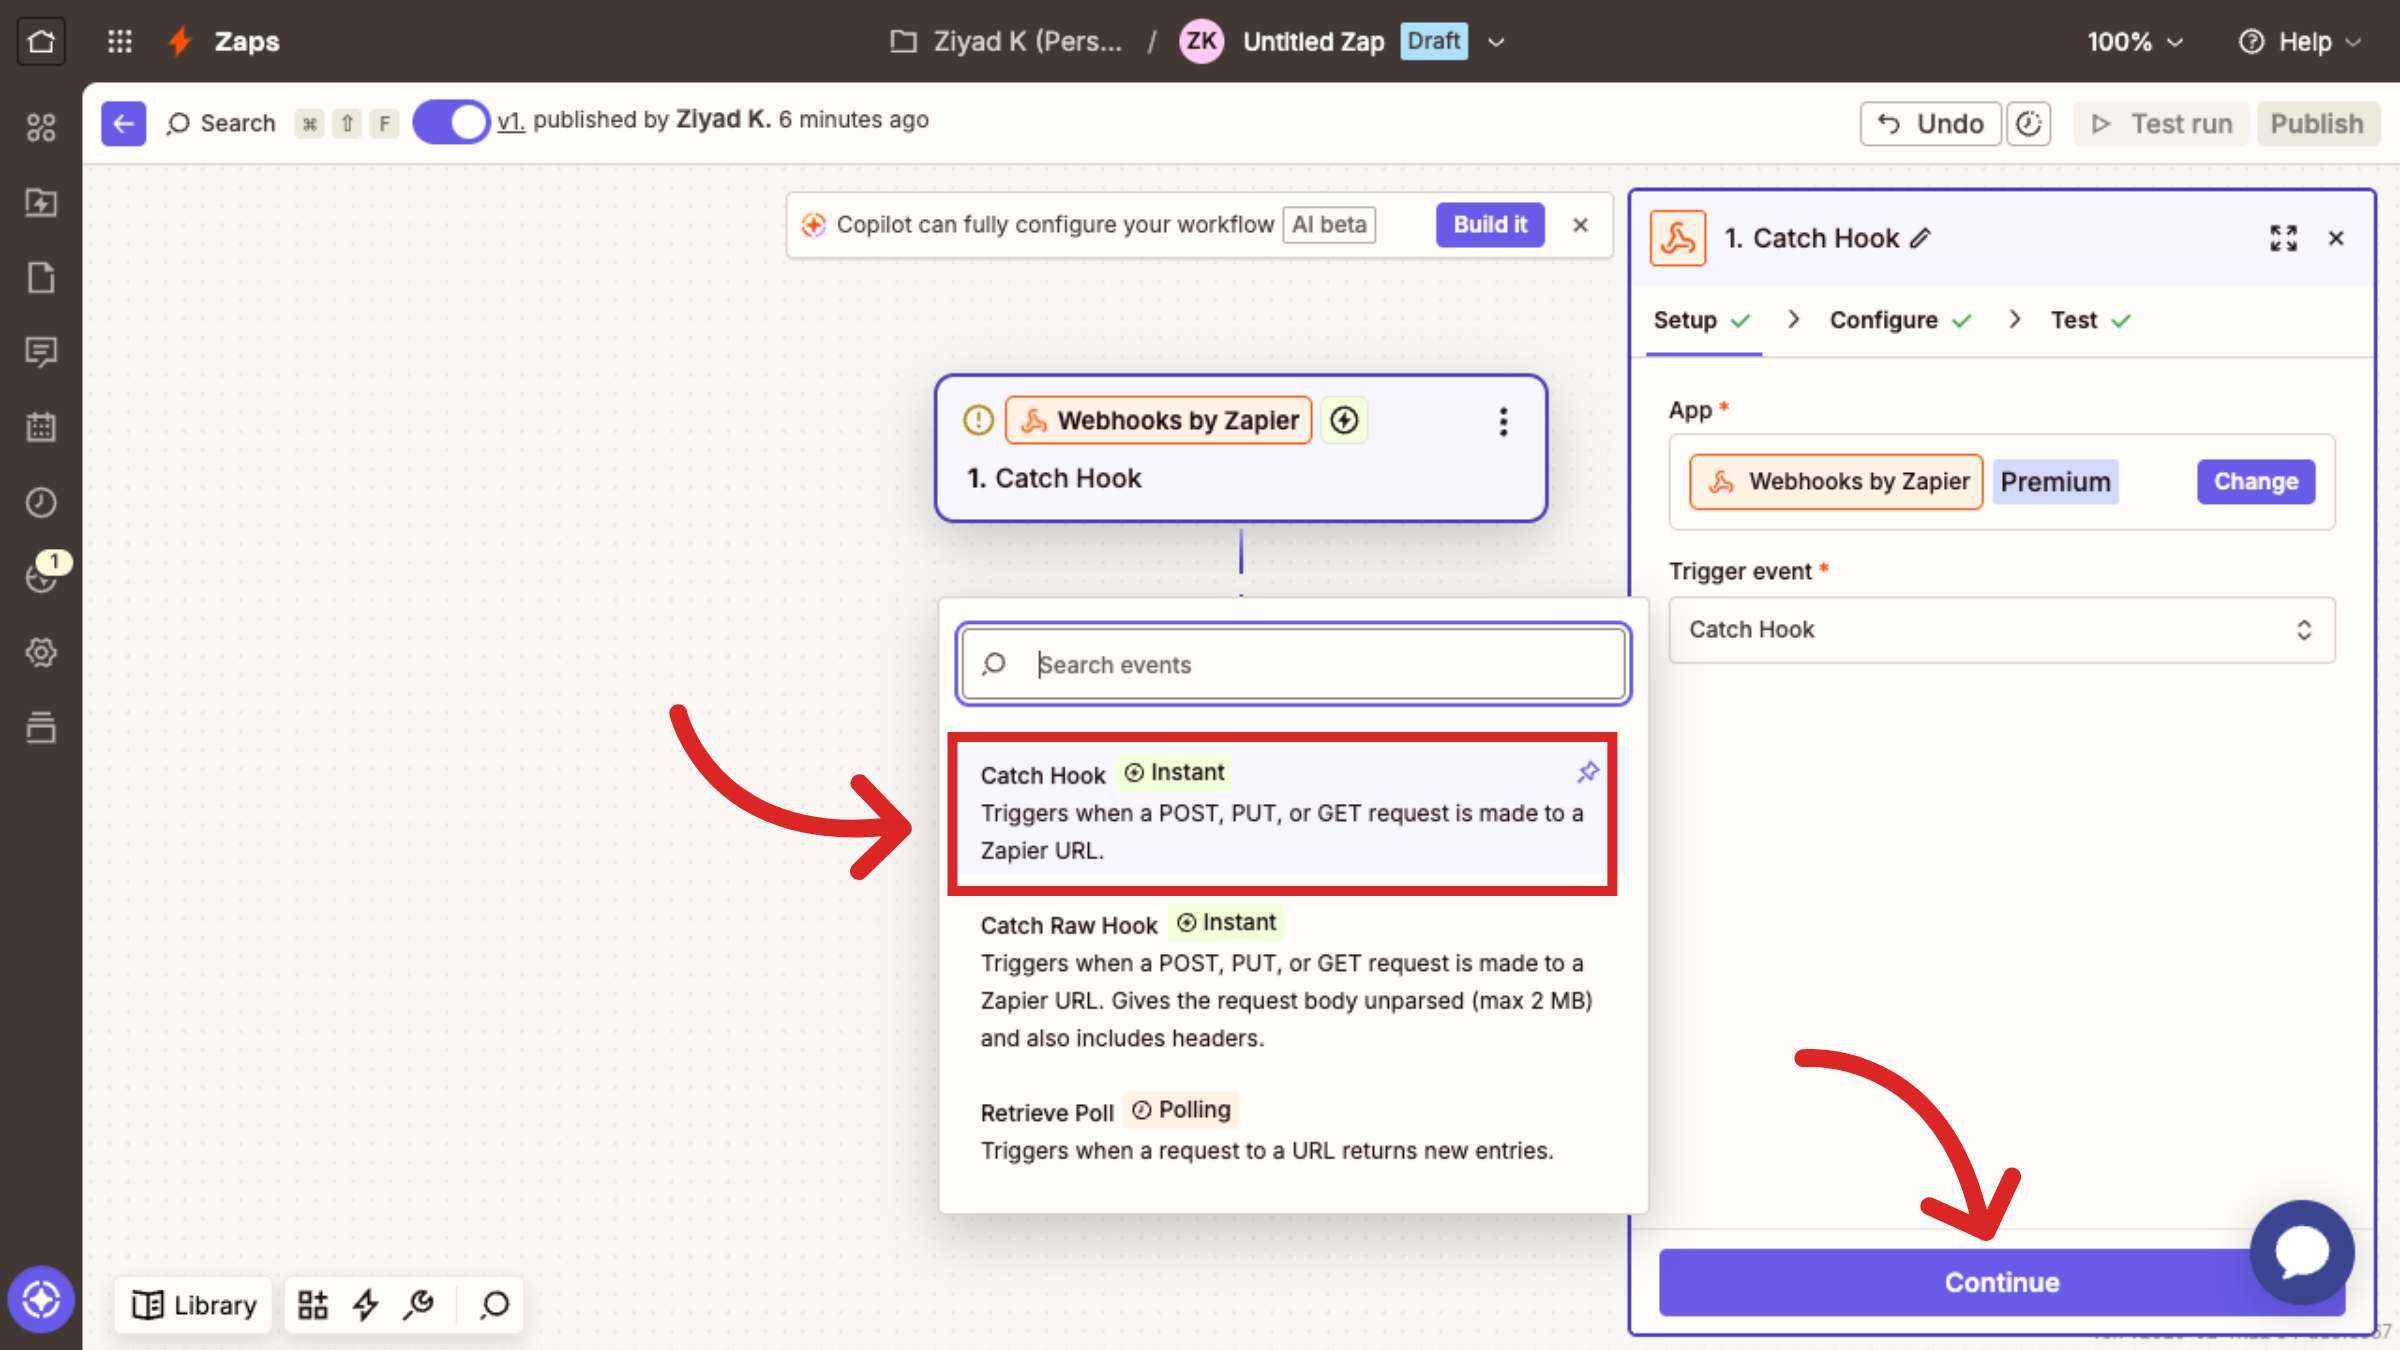
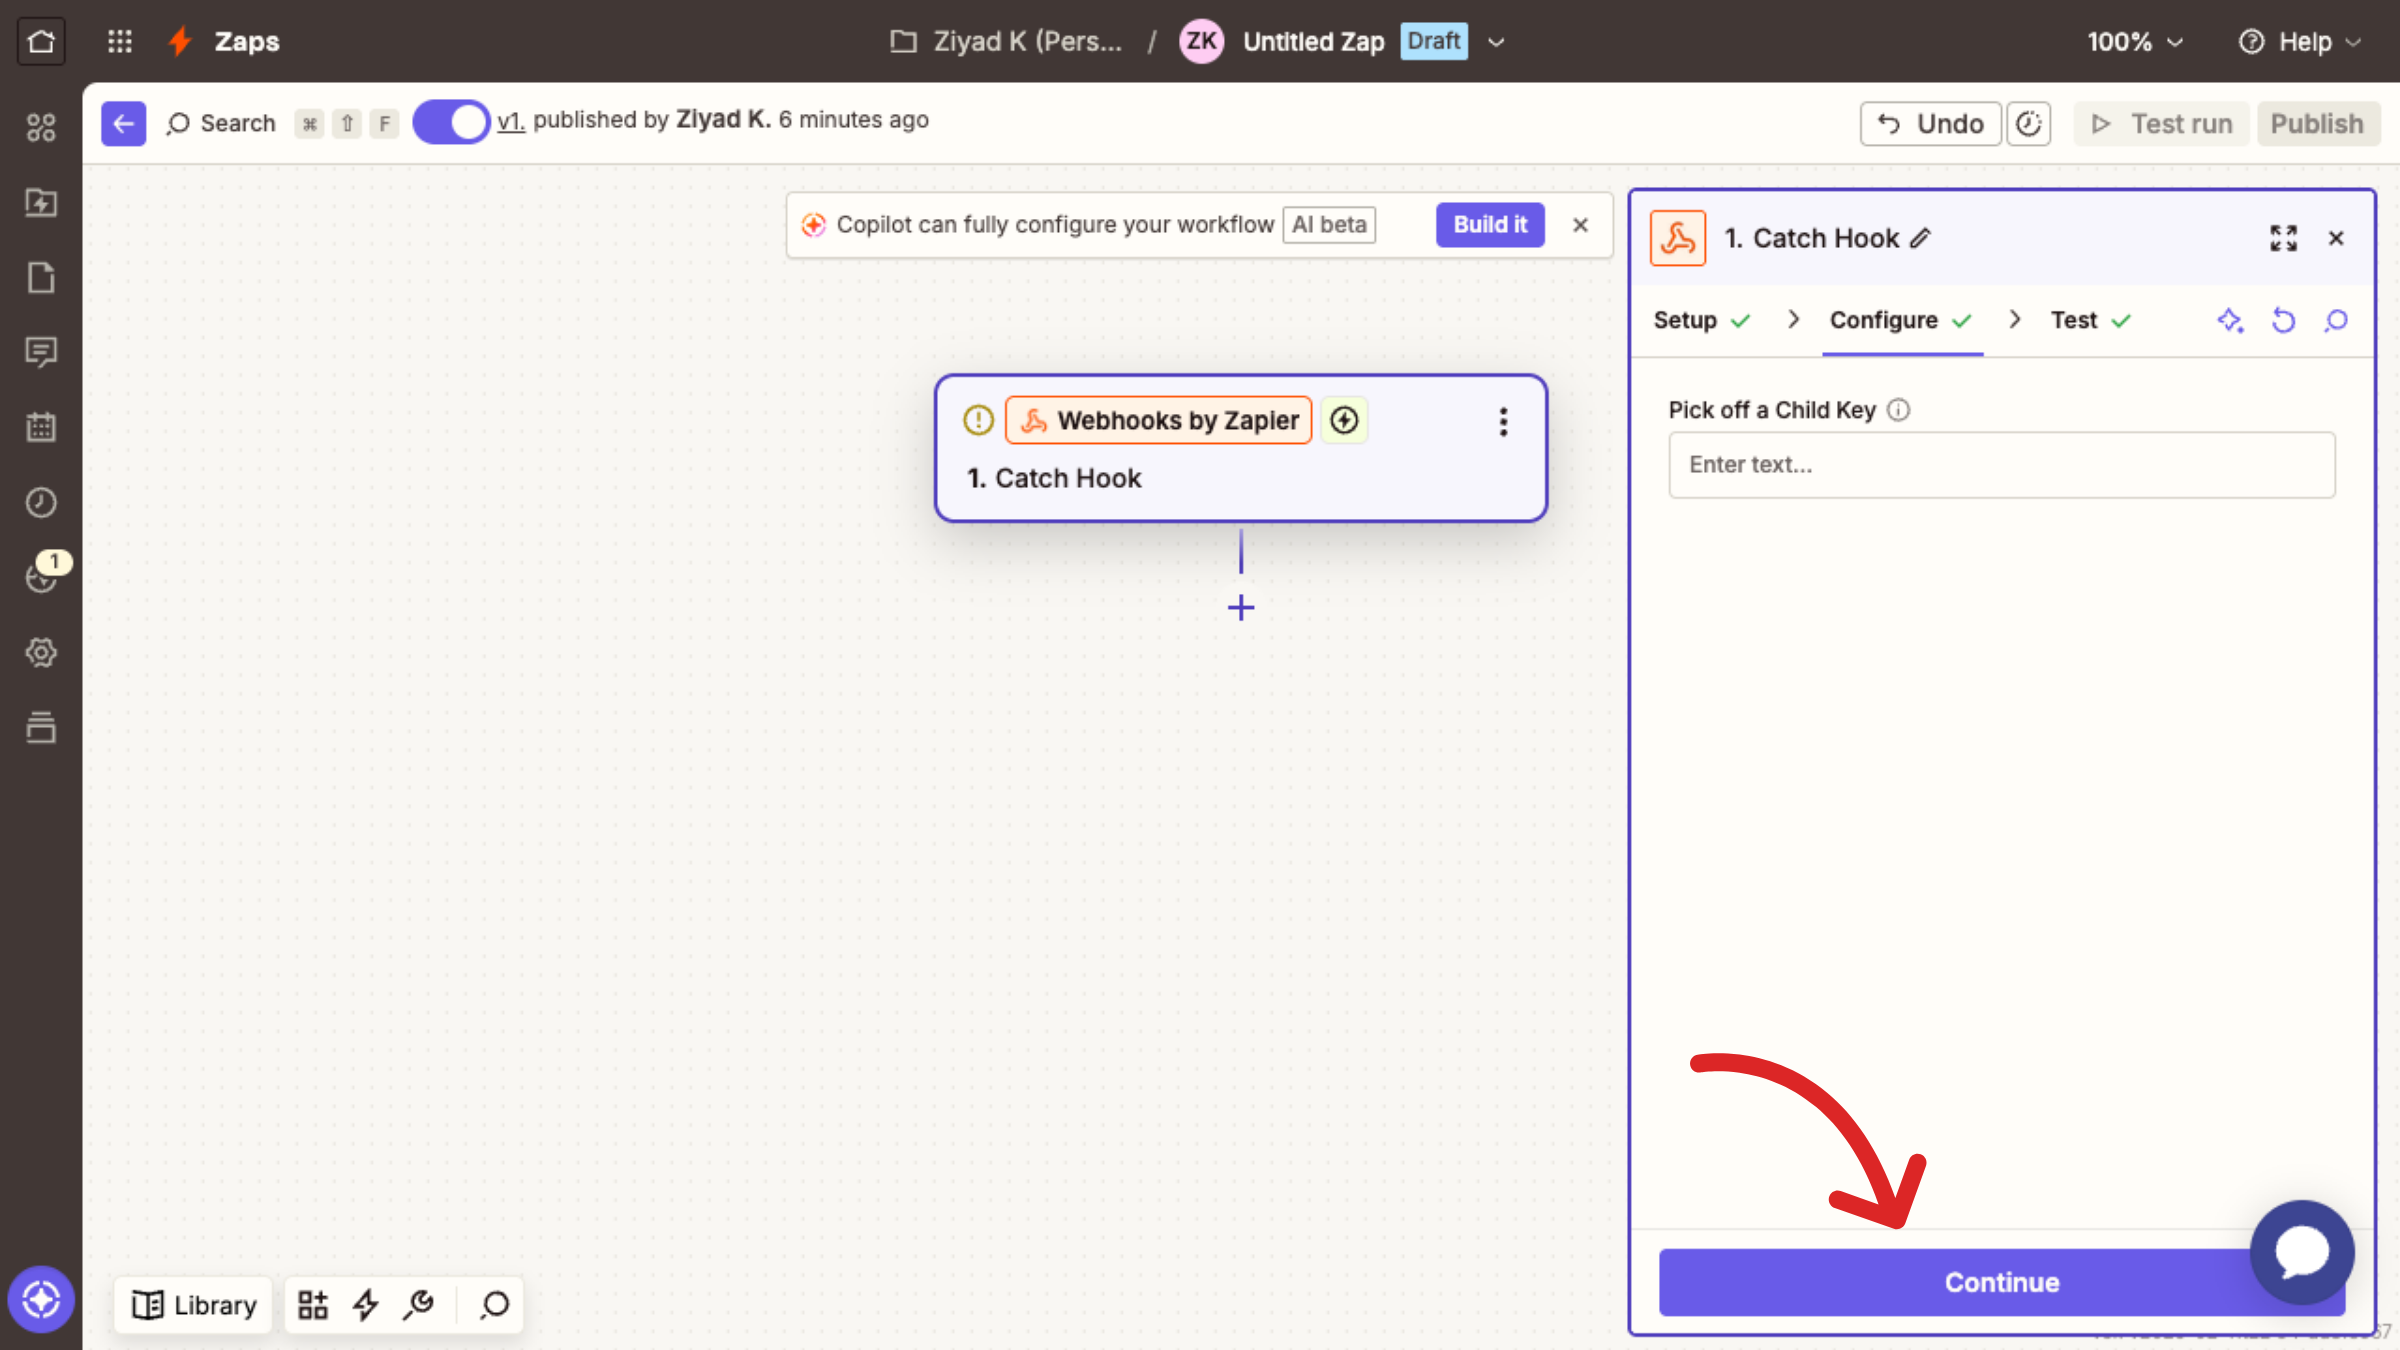
Select Catch Hook as Trigger event. Click Continue.
There is an option to pick a child key in the setup (this is optional). Click Continue.
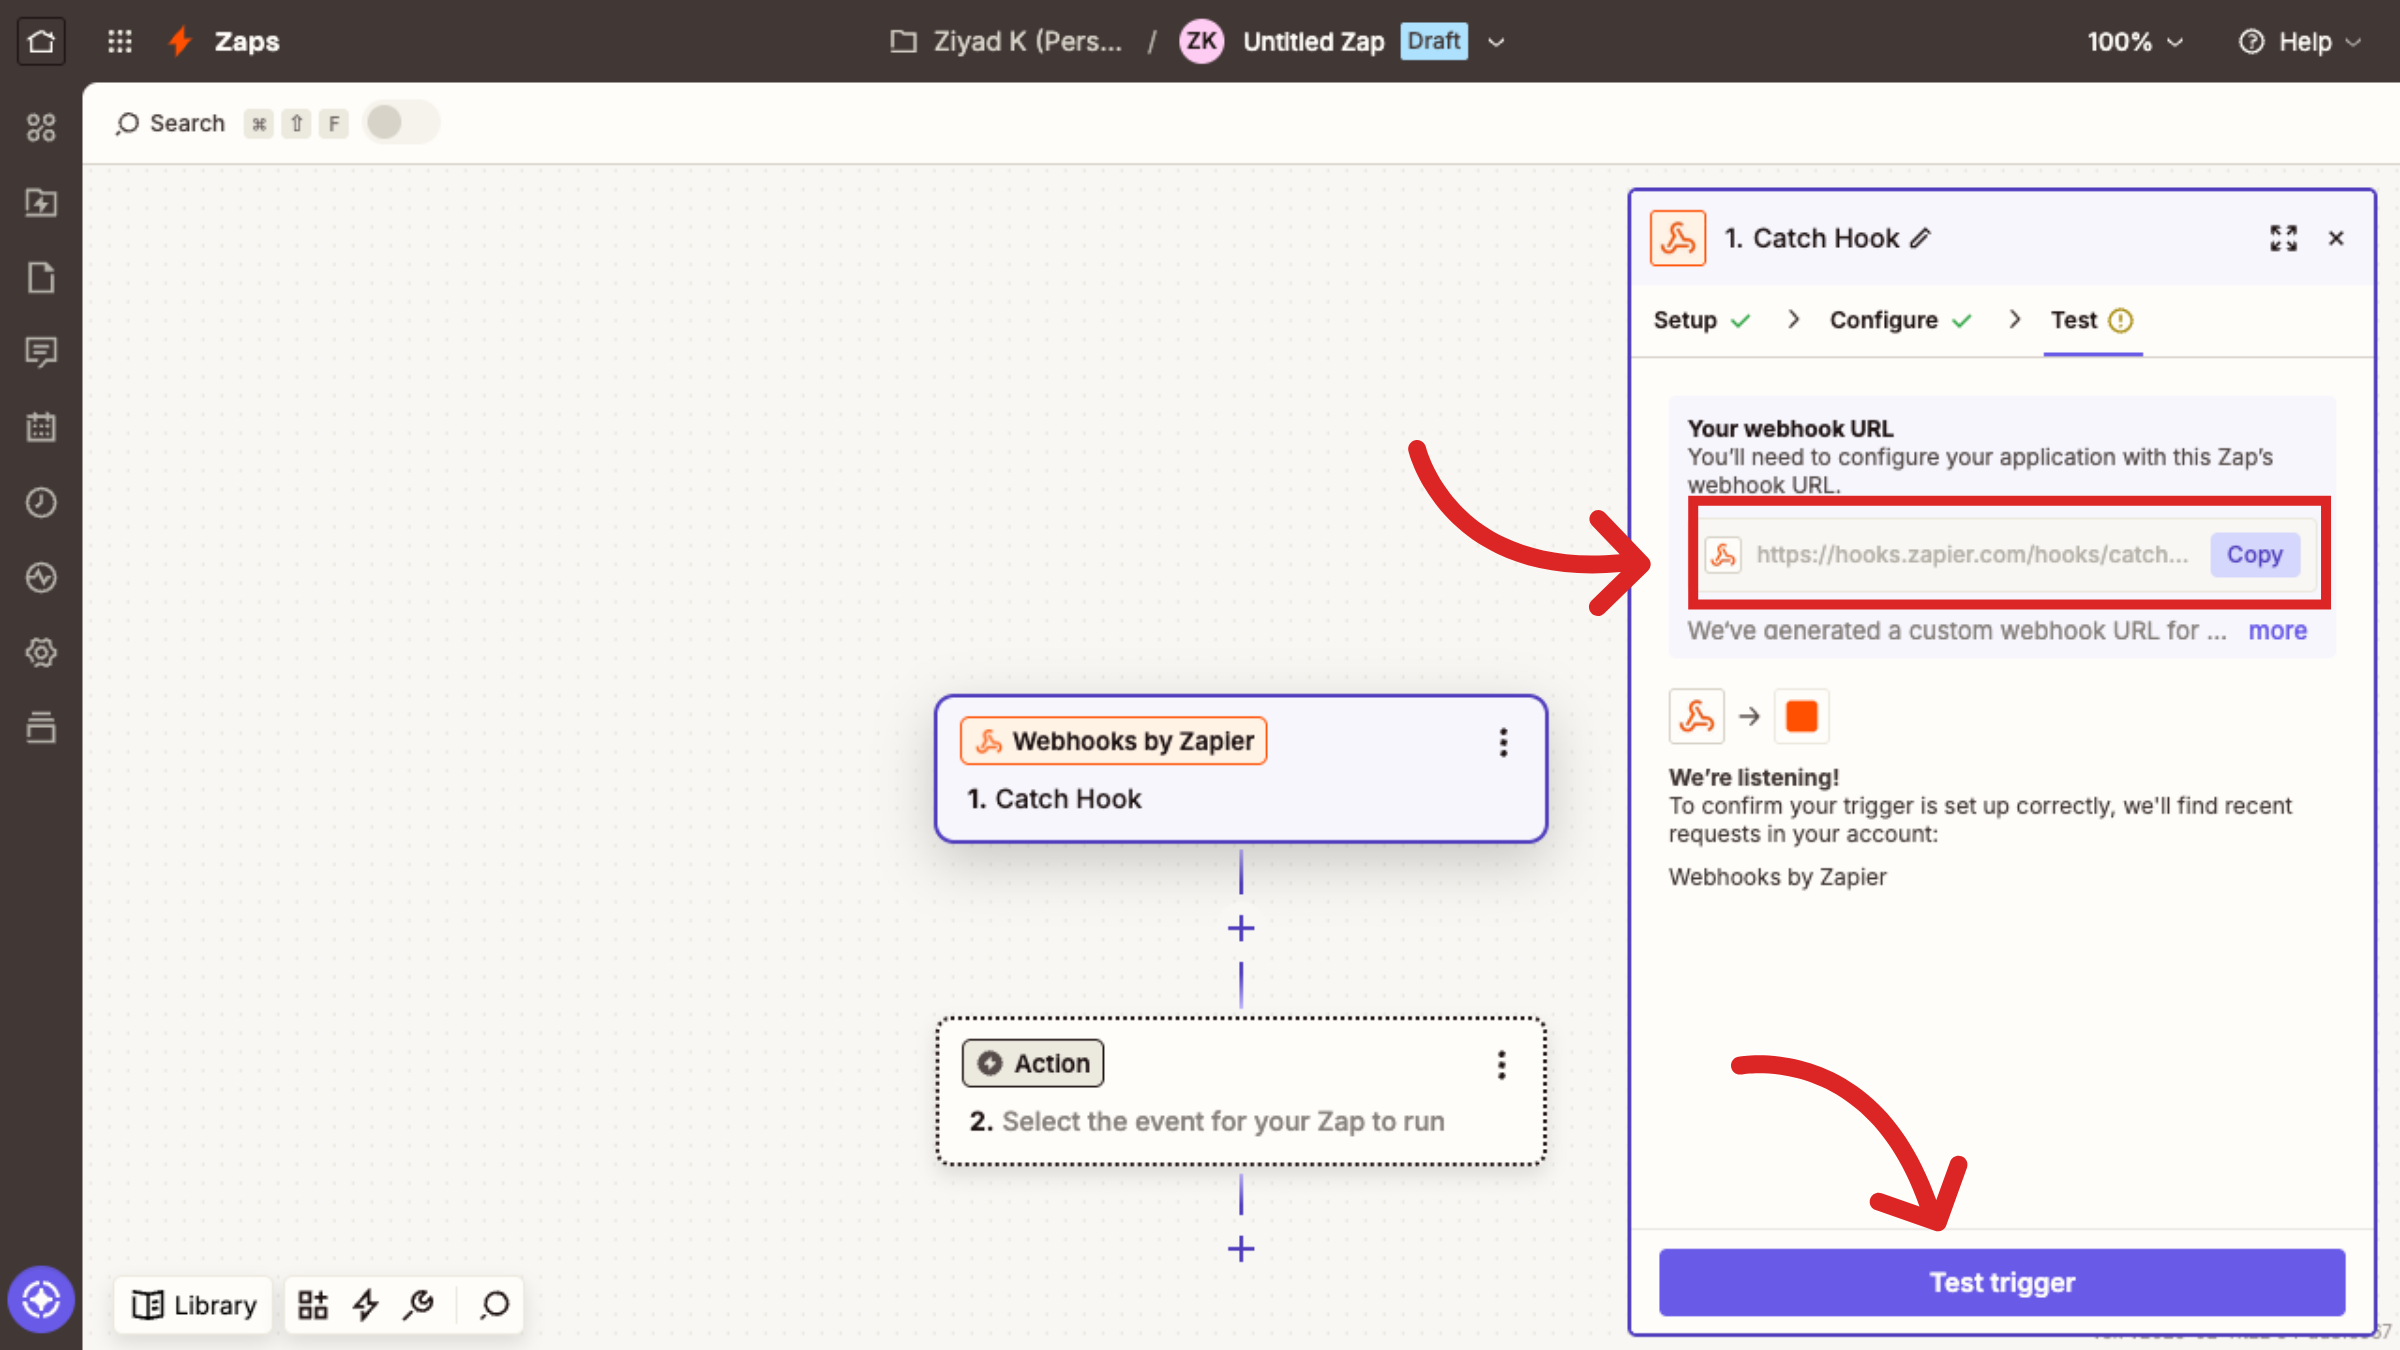
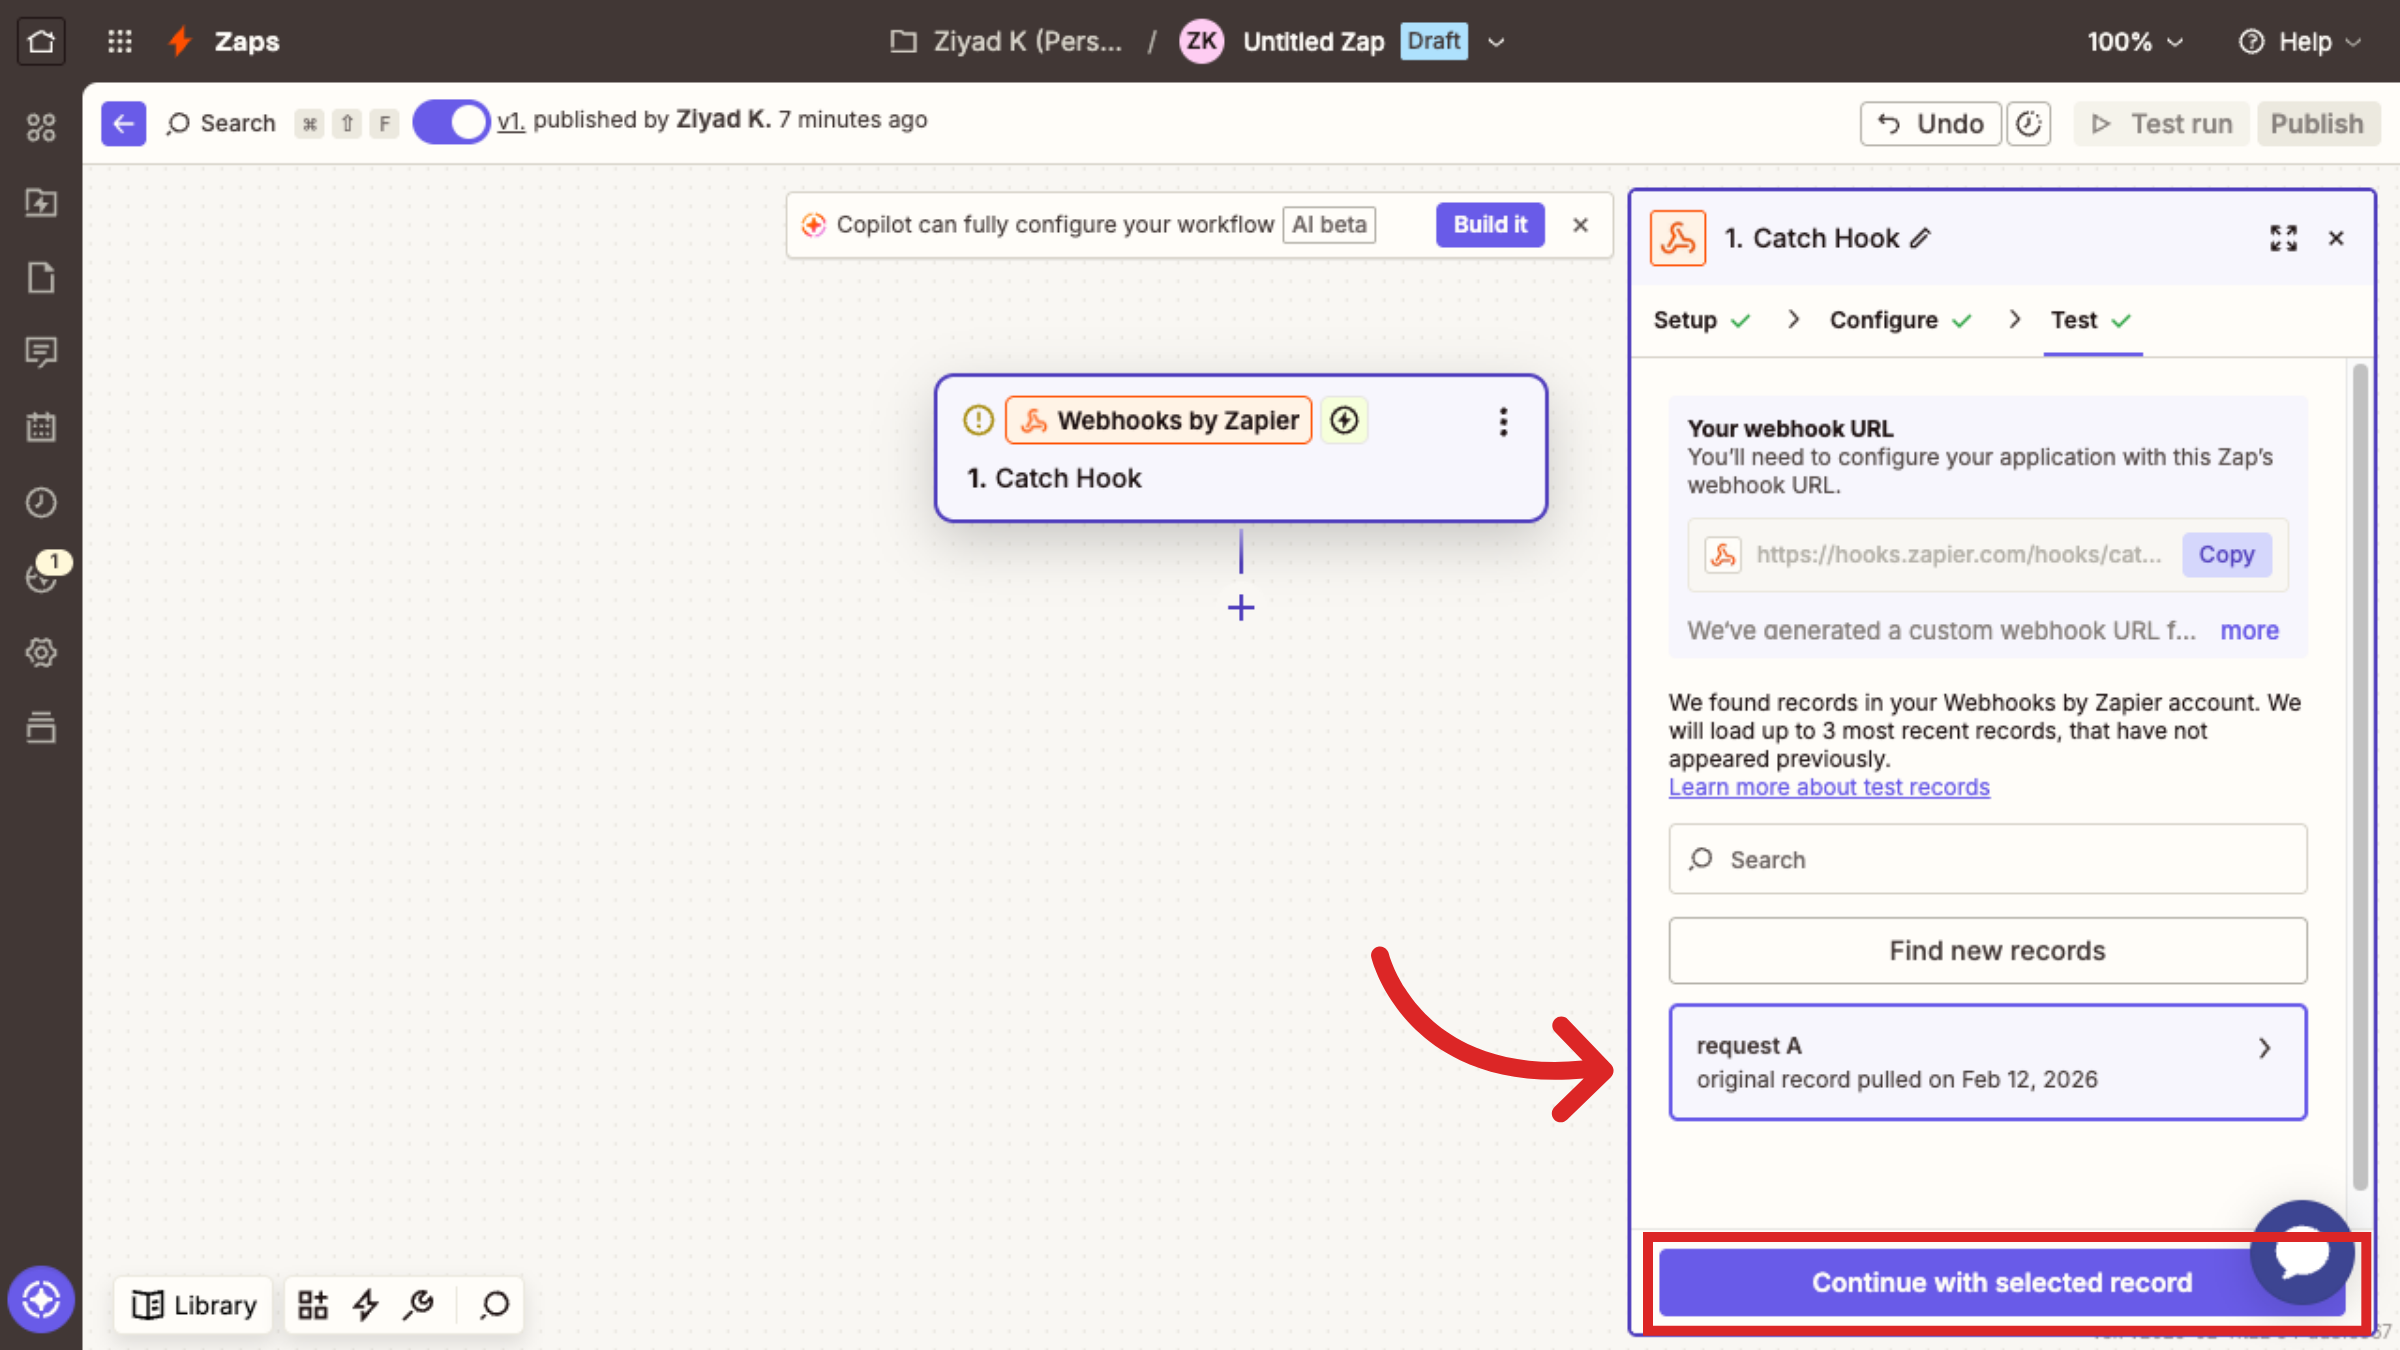
Copy the Webhook URL Zapier gives you.
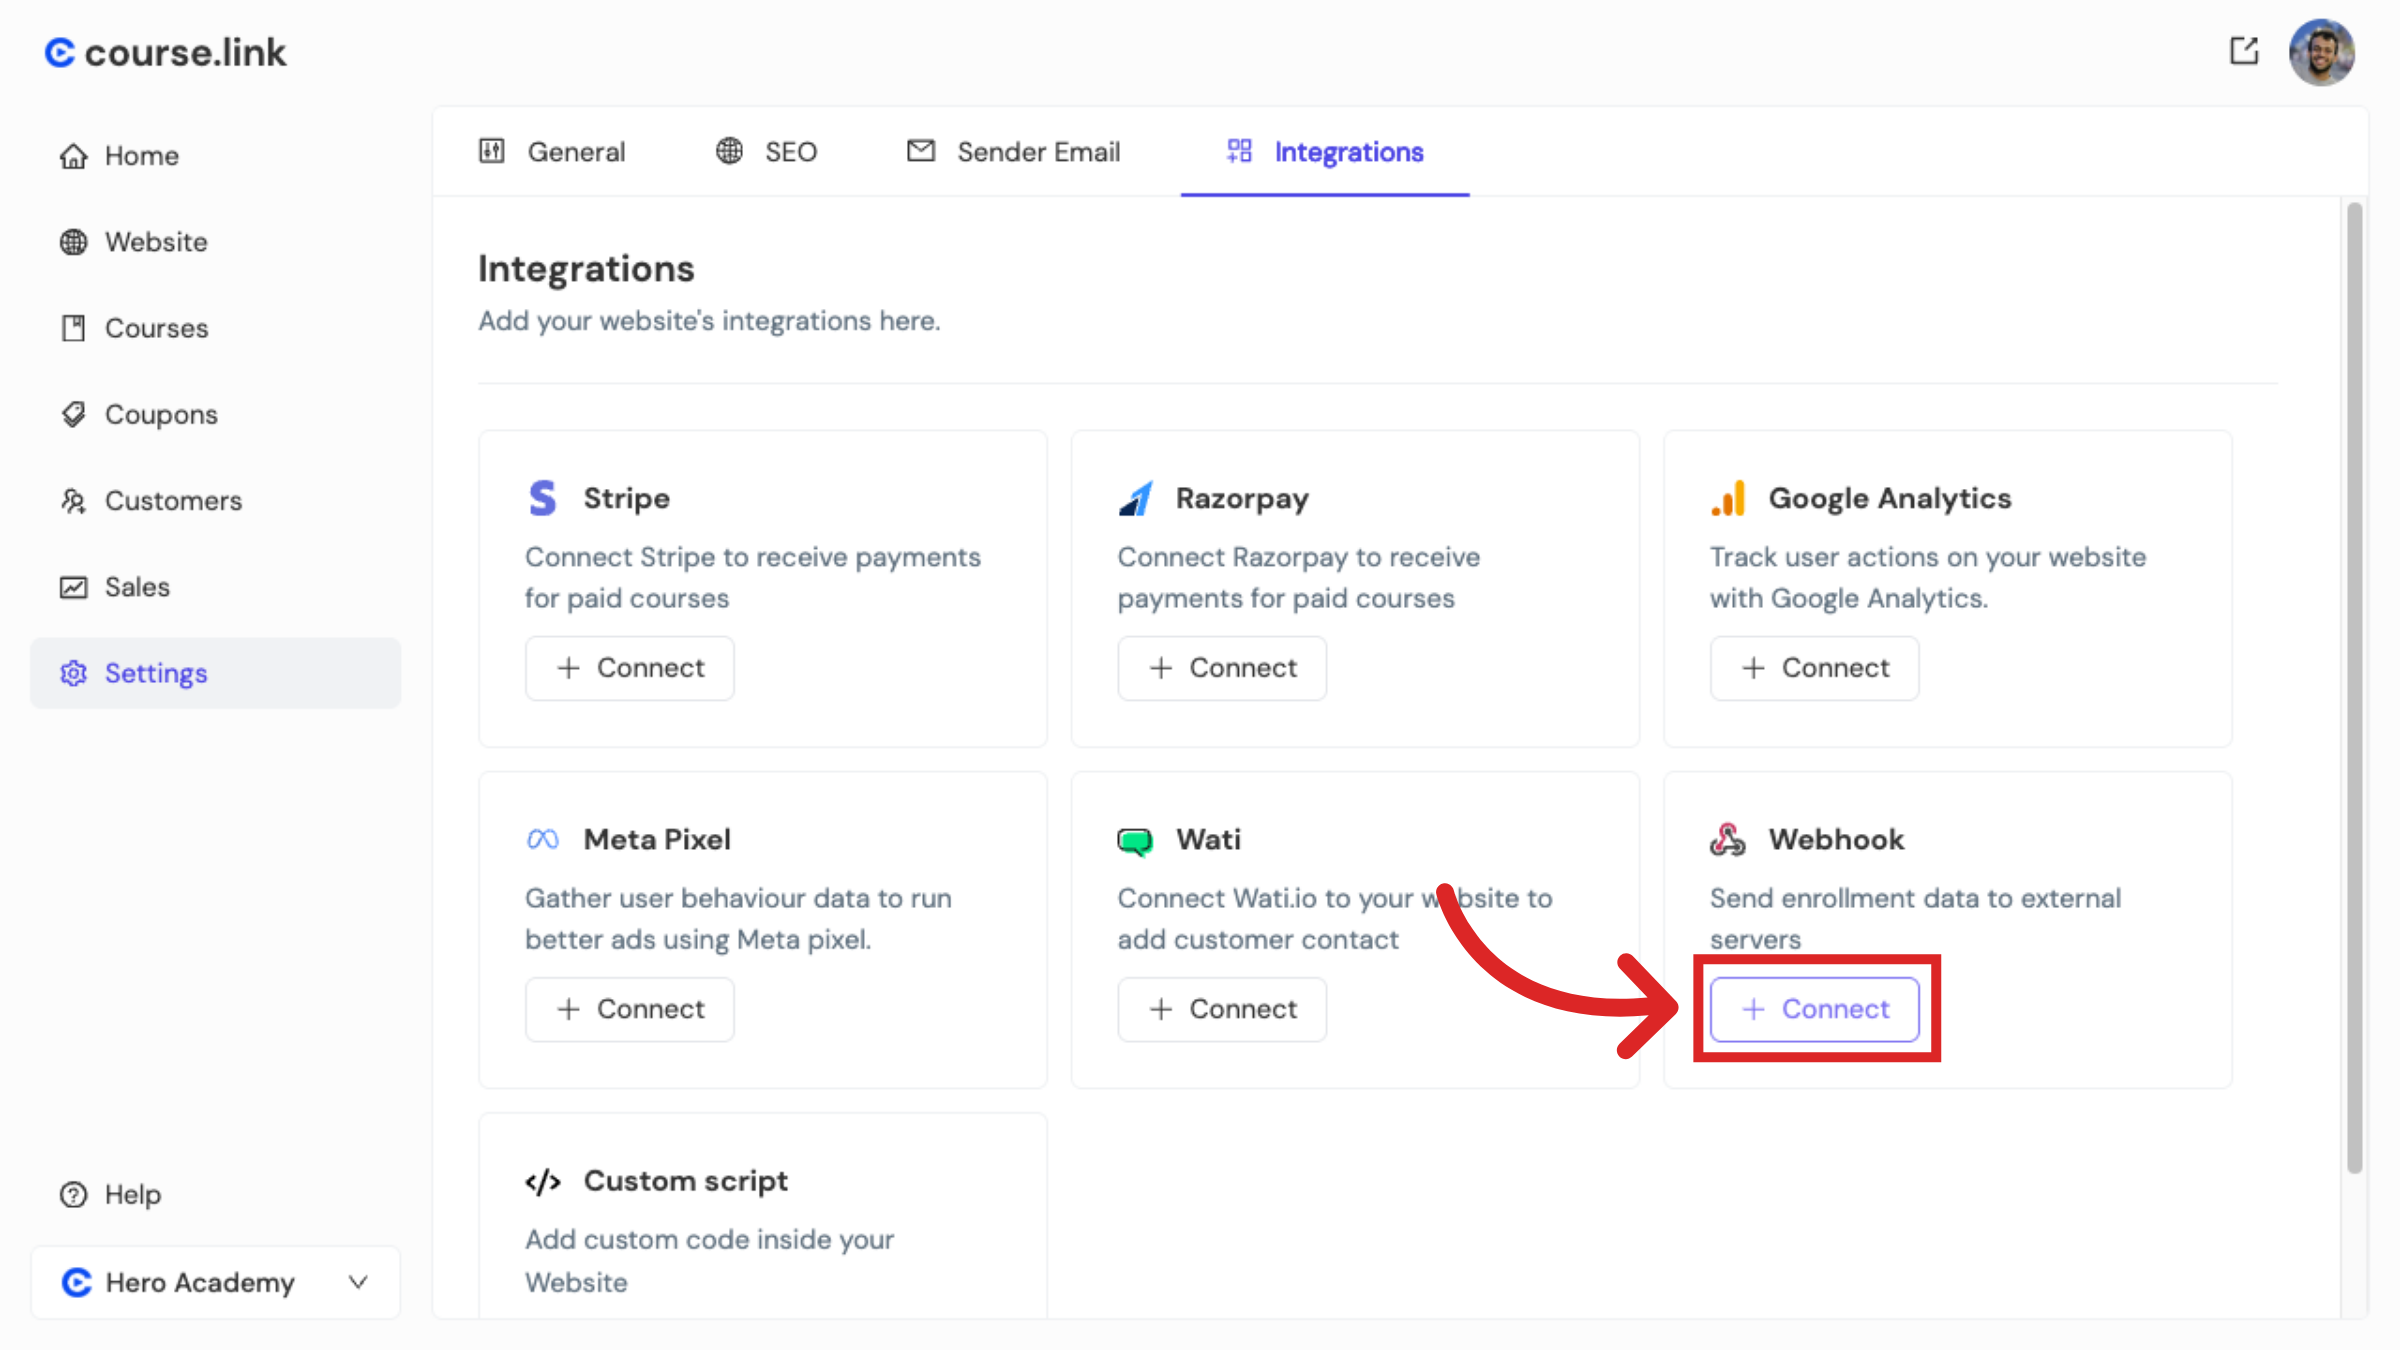
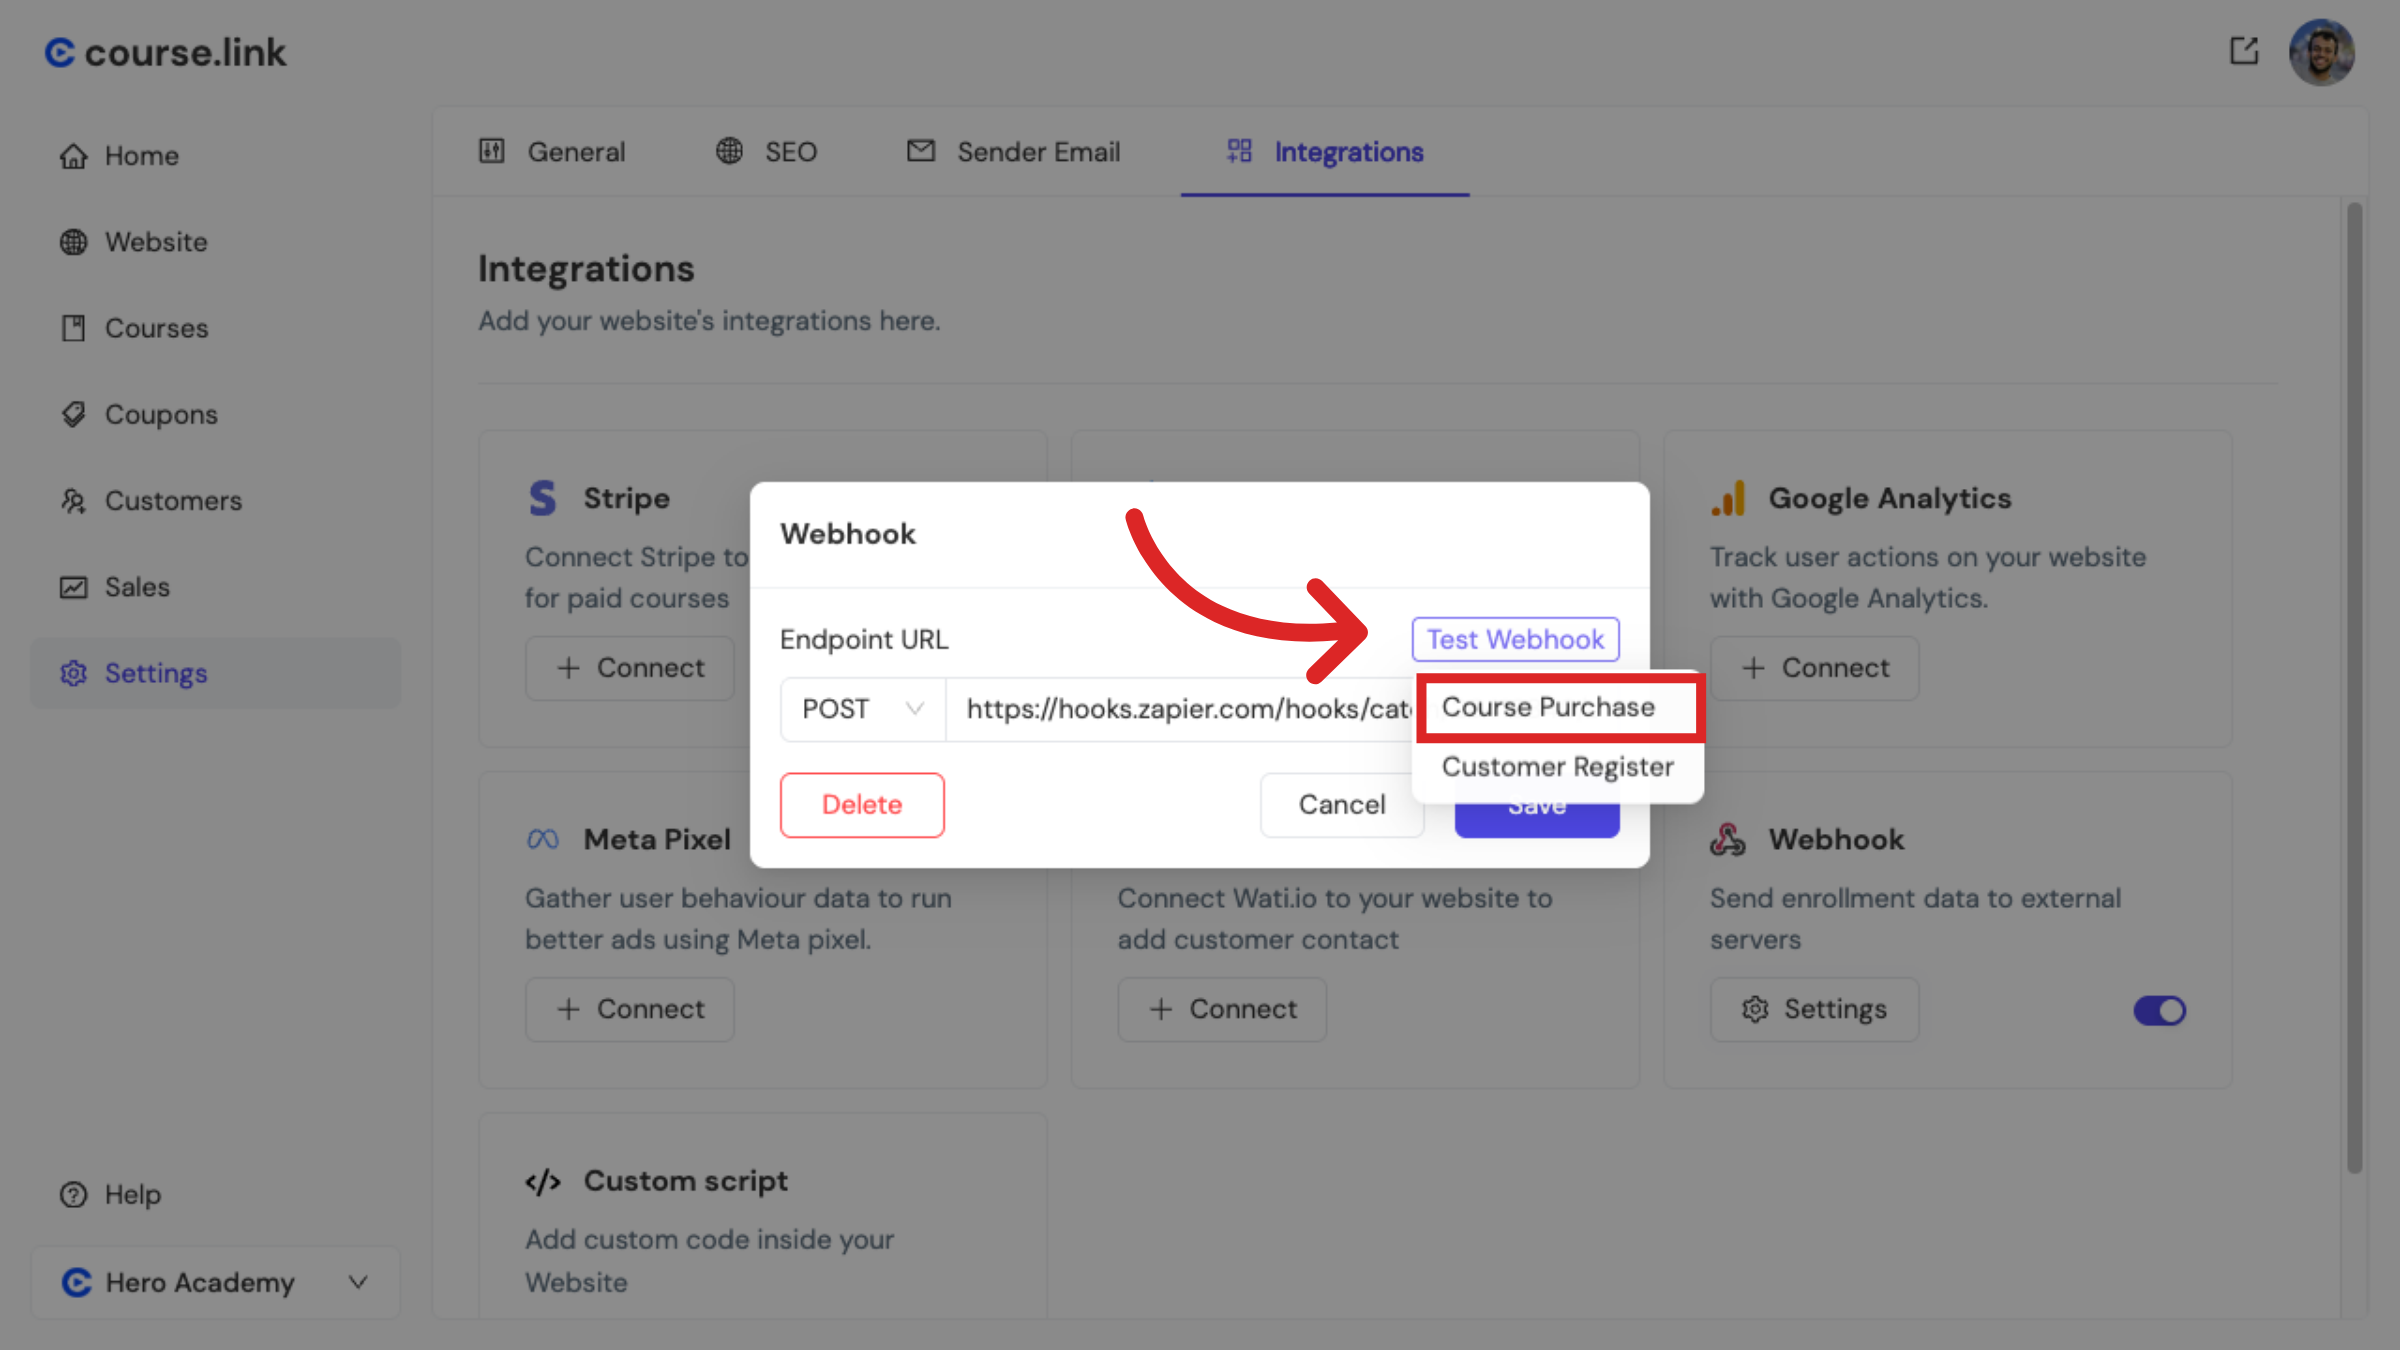
Go to your Course.link dashboard → Settings → Integrations. Click the Connect button next to the Webhooks option.
Paste your Webhook URL.
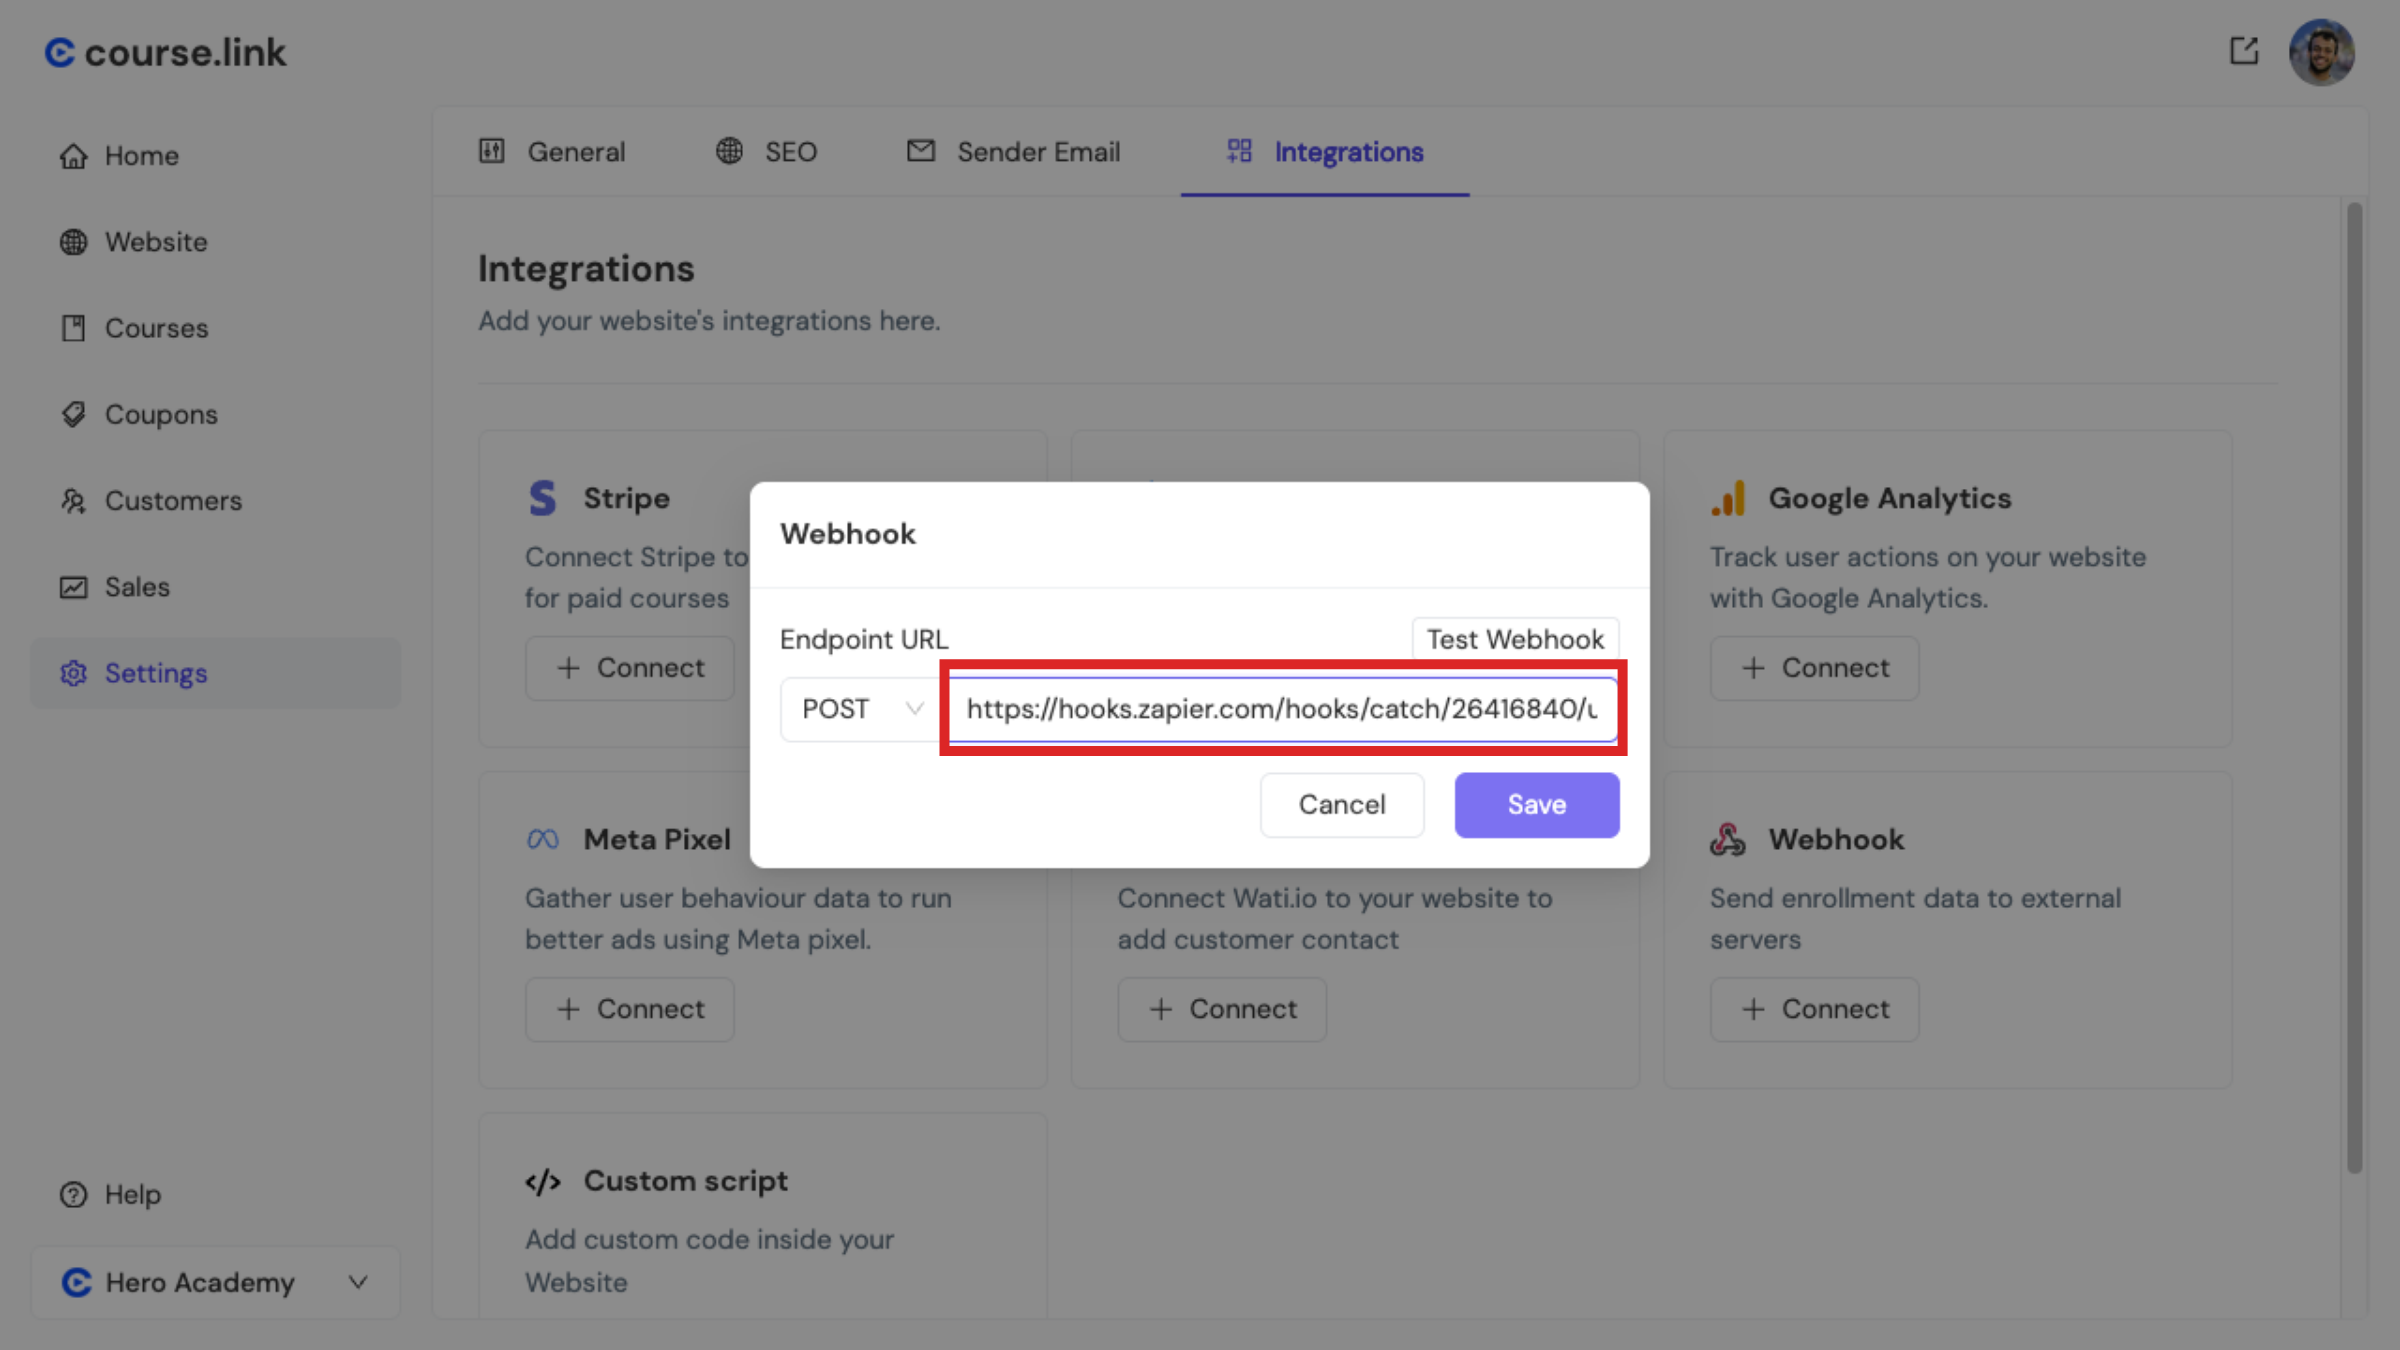
Click Test Webhook, then choose an event to send test data to your webhook URL.
Return to Zapier and click Test Trigger.
Zapier should show the event data you just made and this means the connection between Course.link and Zapier webhooks is a success. Click on Continue with selected record.
Connect Zapier to Google Sheets
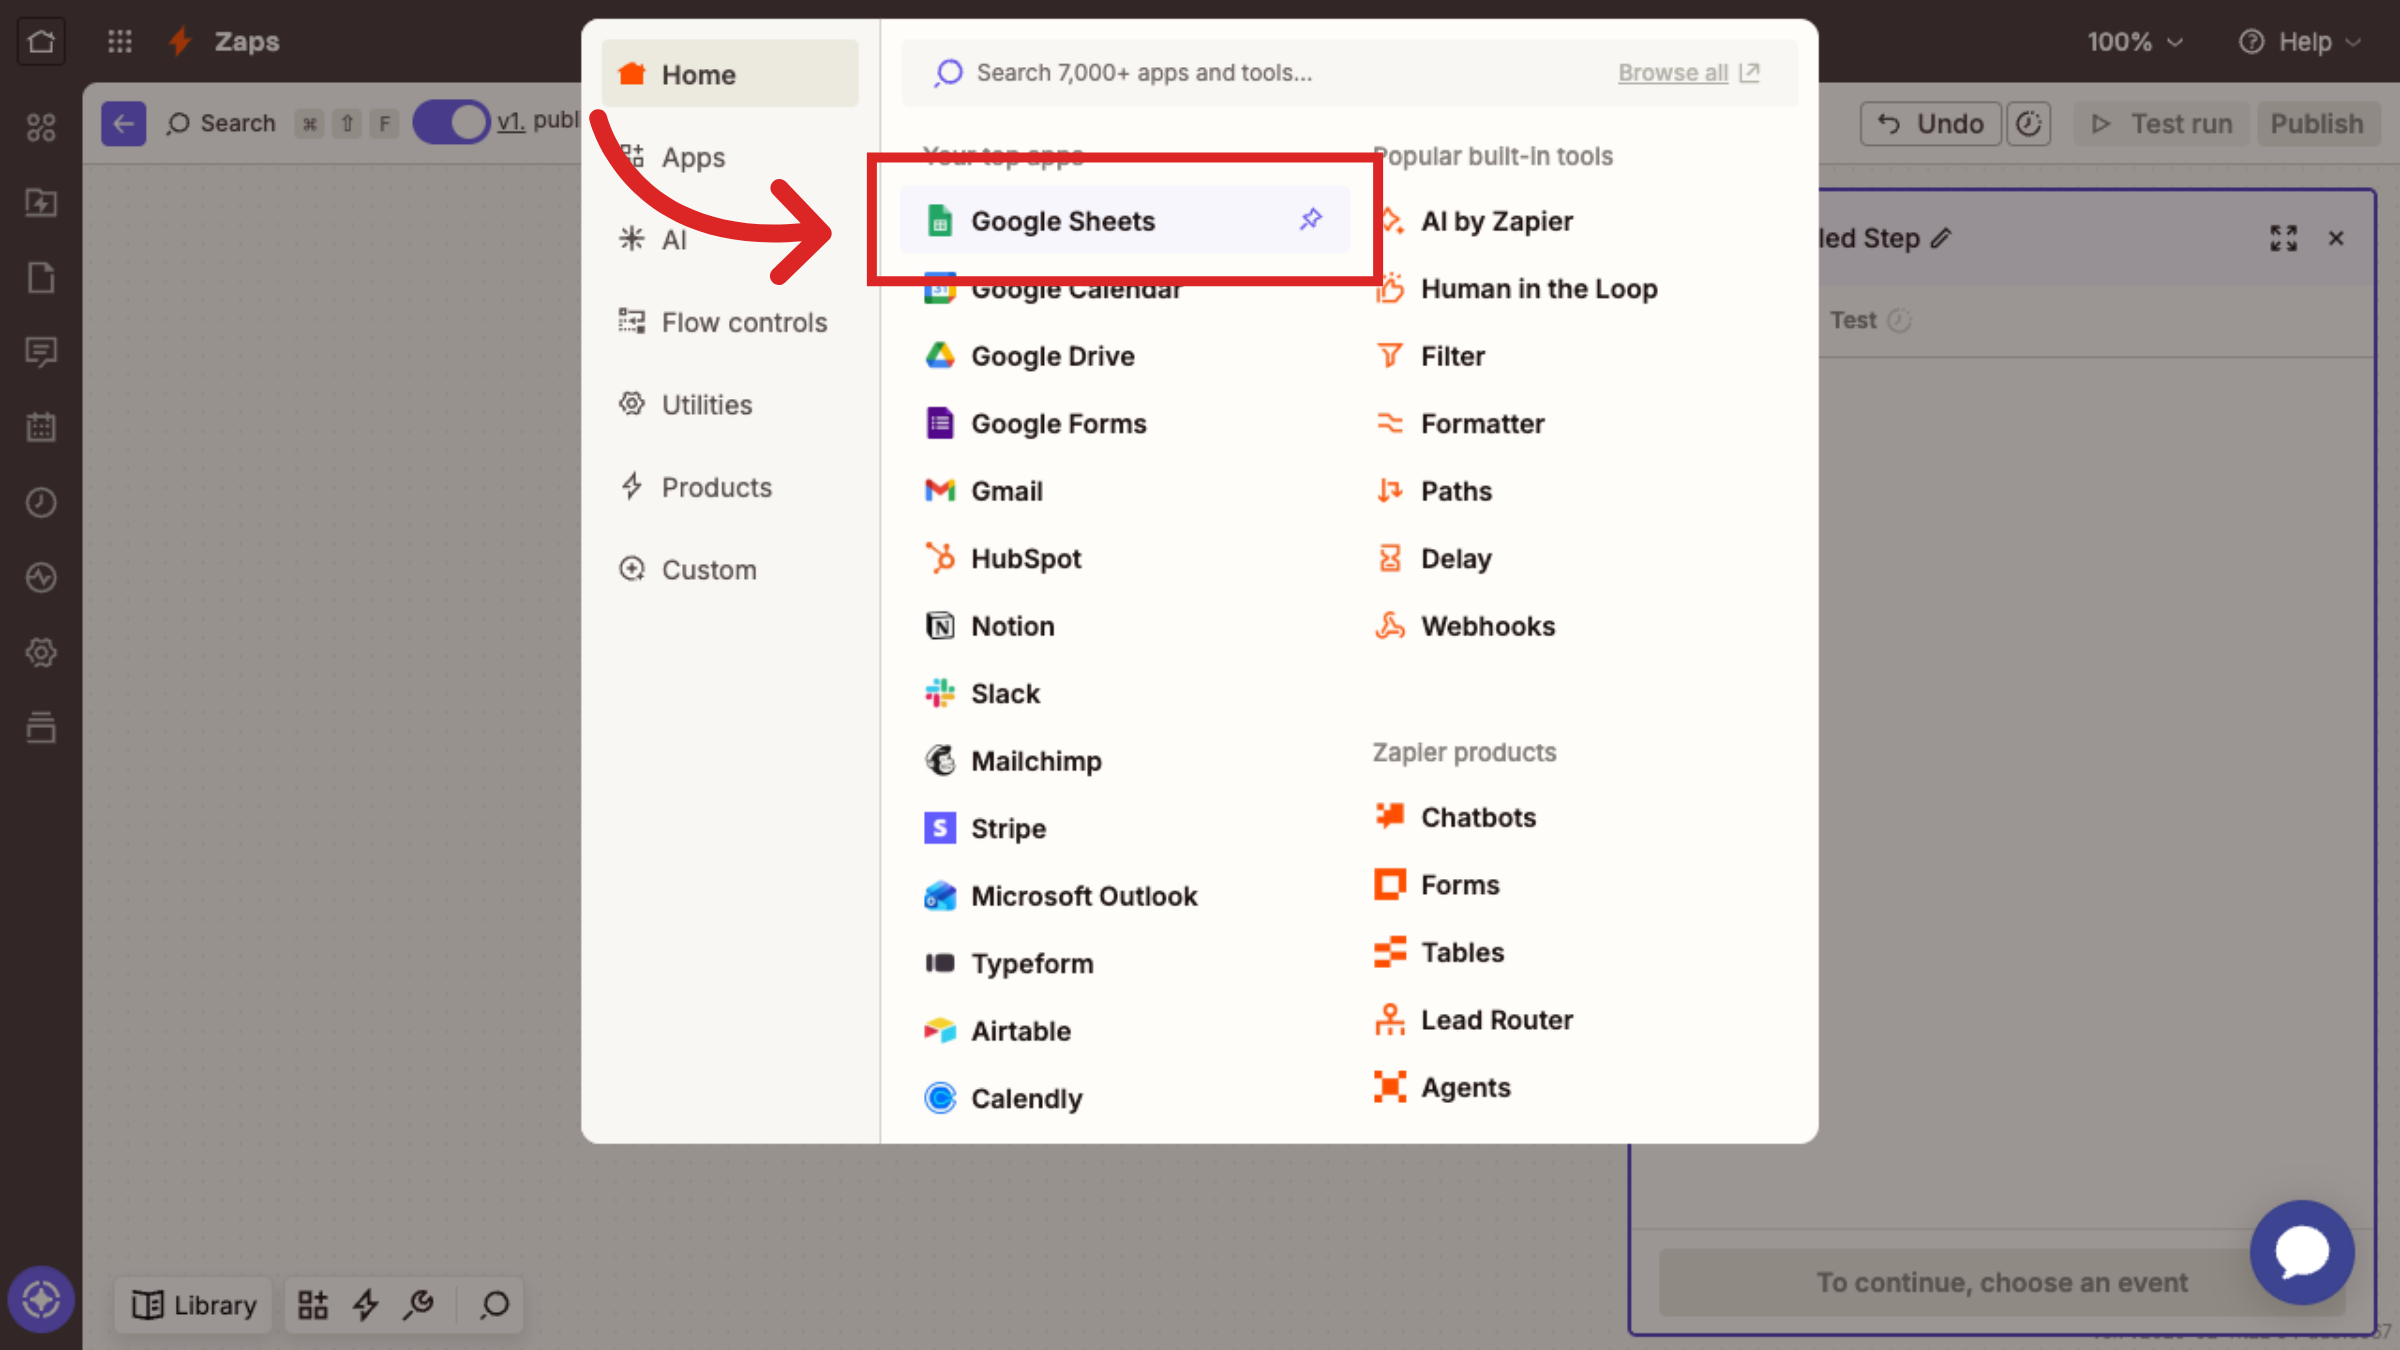
Now its time to connect Zapier to Google Sheets. The aim is to push the incoming information from Course.link website to your chosen Google Sheet. Let's define that action in Zapier.
Choose the Action event. Search for Google Sheets and select it.
Select an Action event, here we are selecting Create Spreadsheet Row.
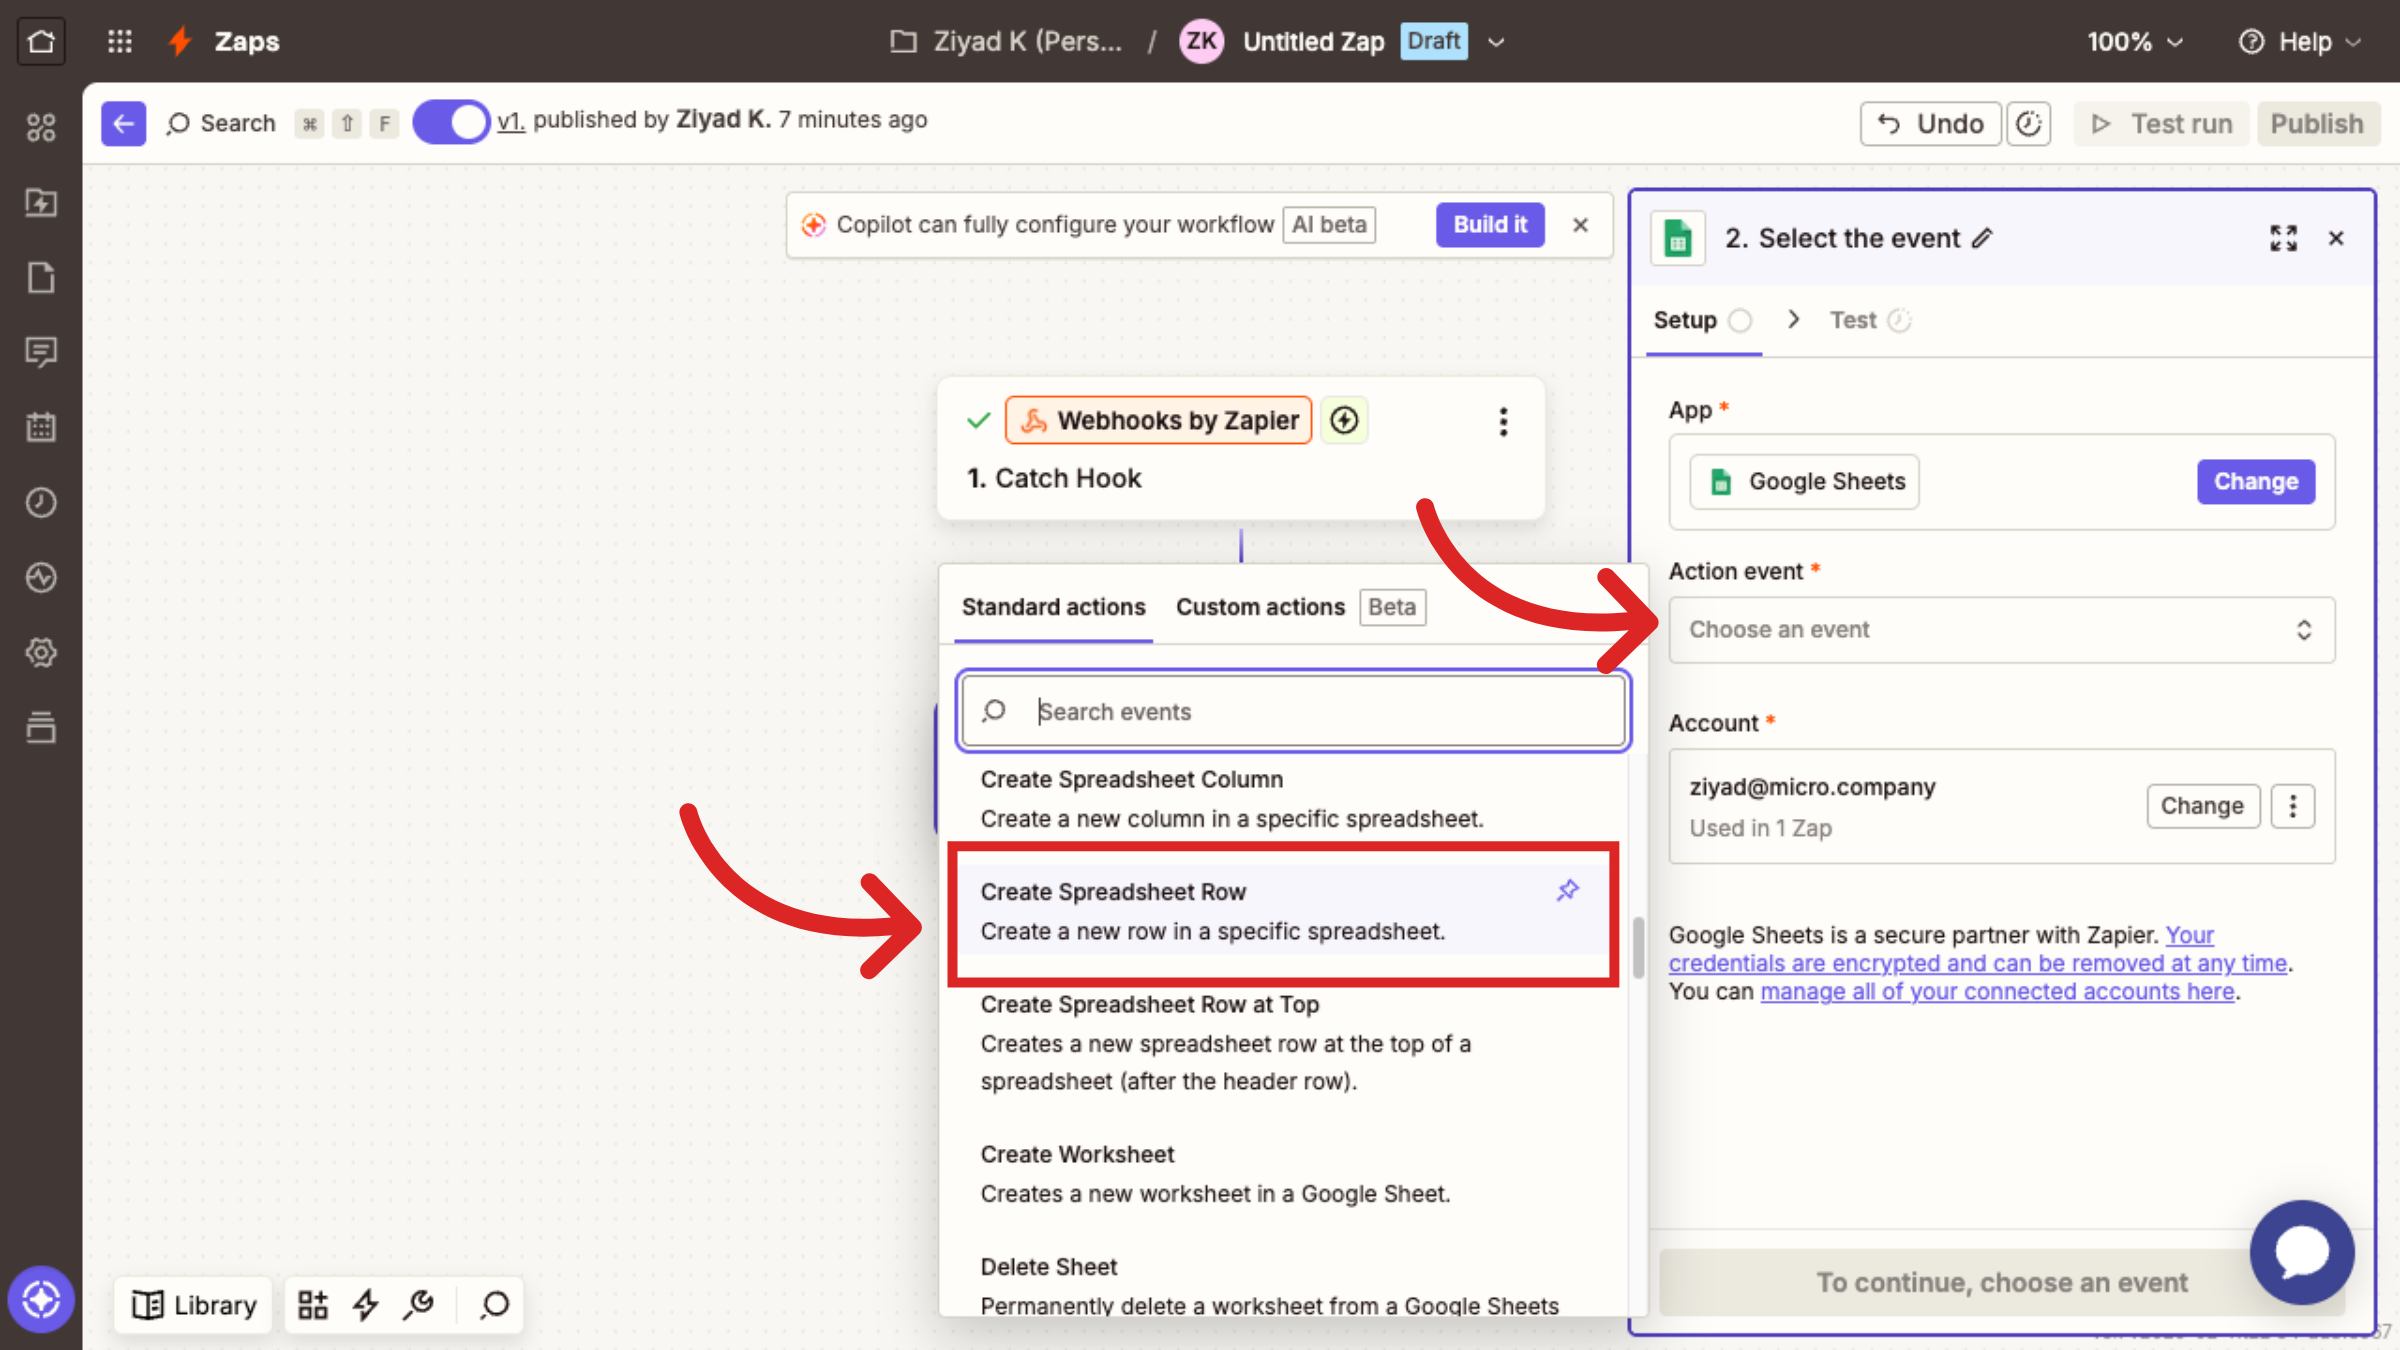
Click on Continue.
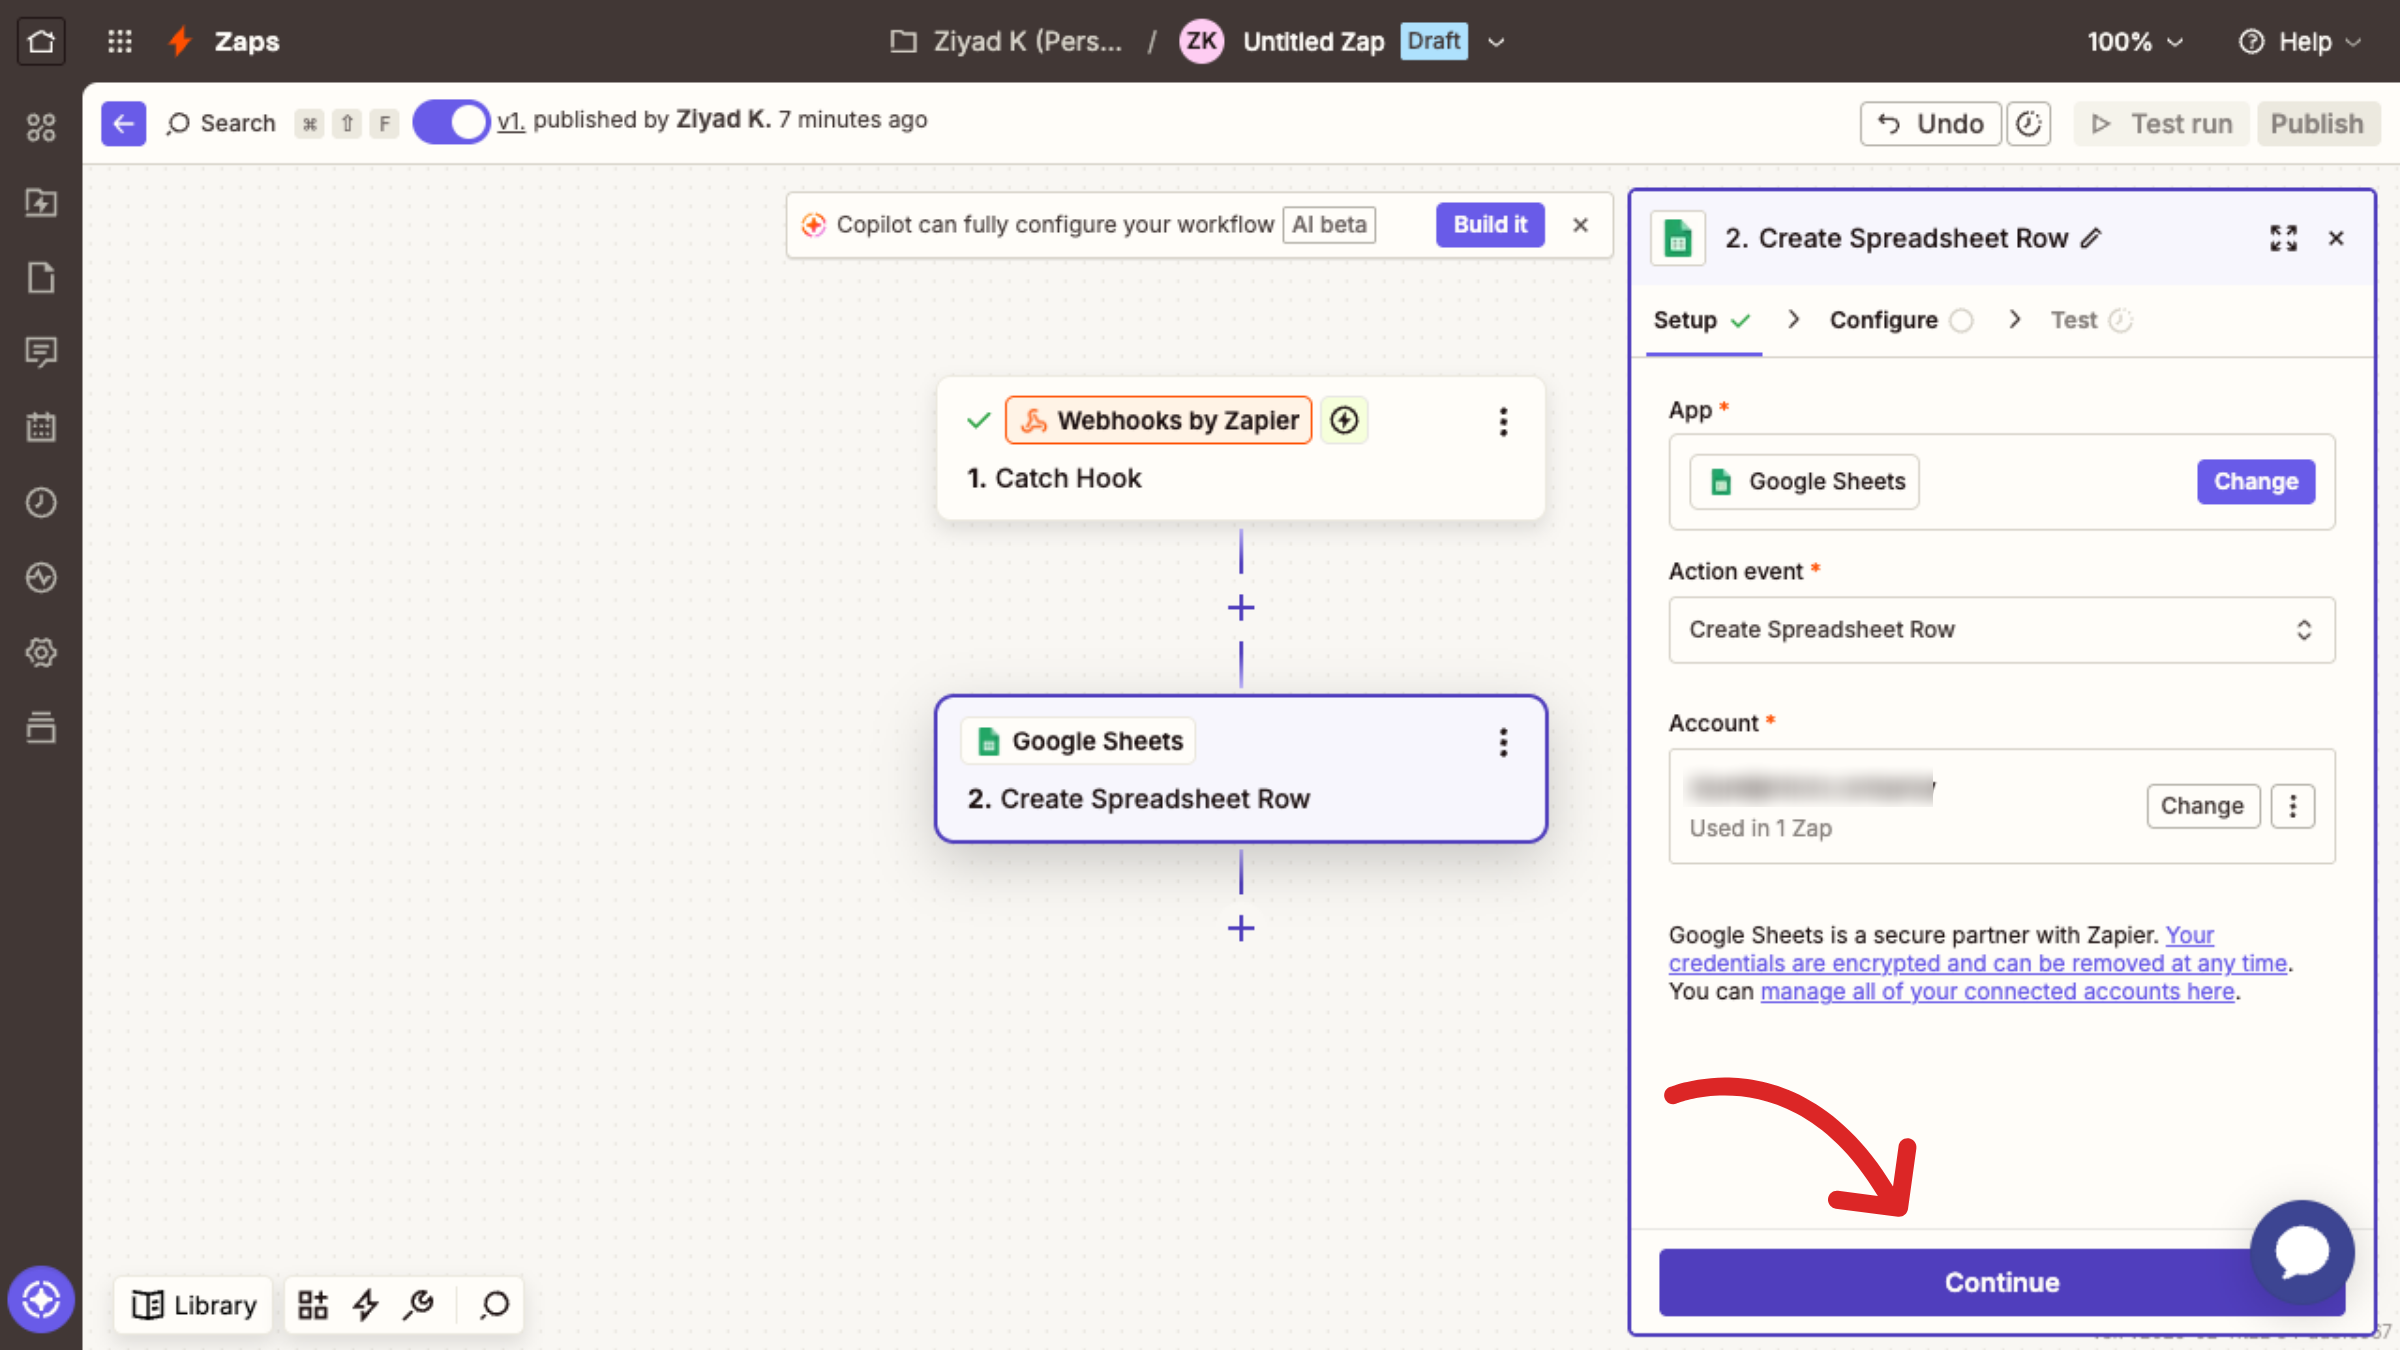
Choose the Drive where your spreadsheet is saved.
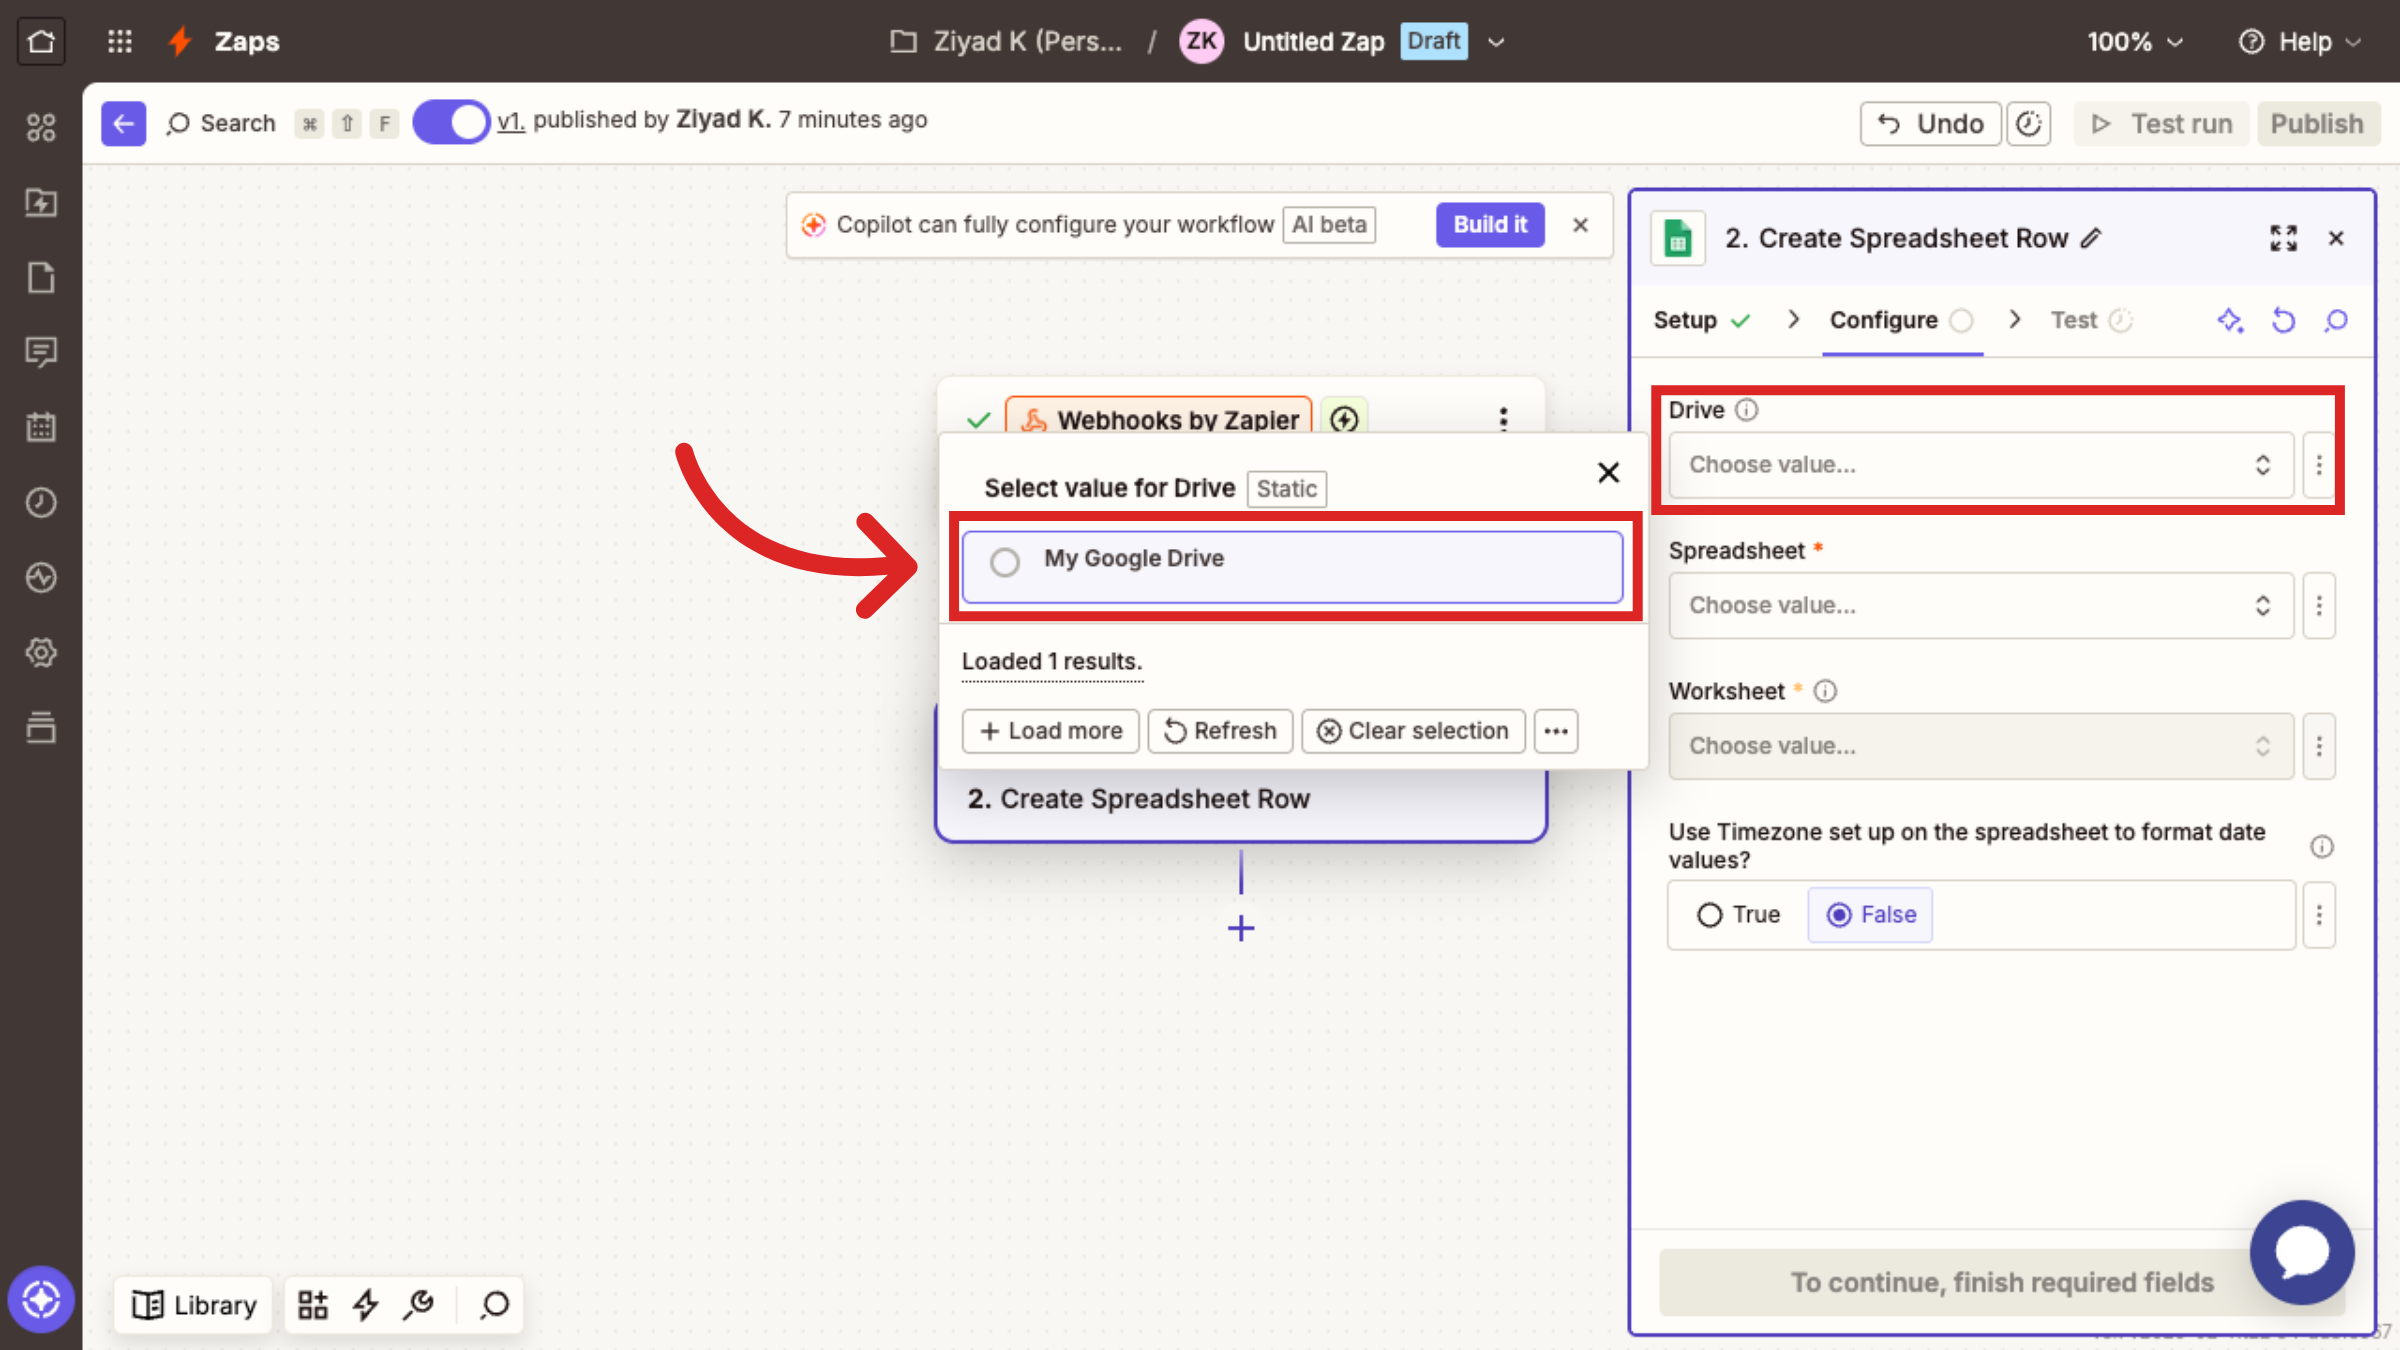
Choose the spreadsheet to add your data to.
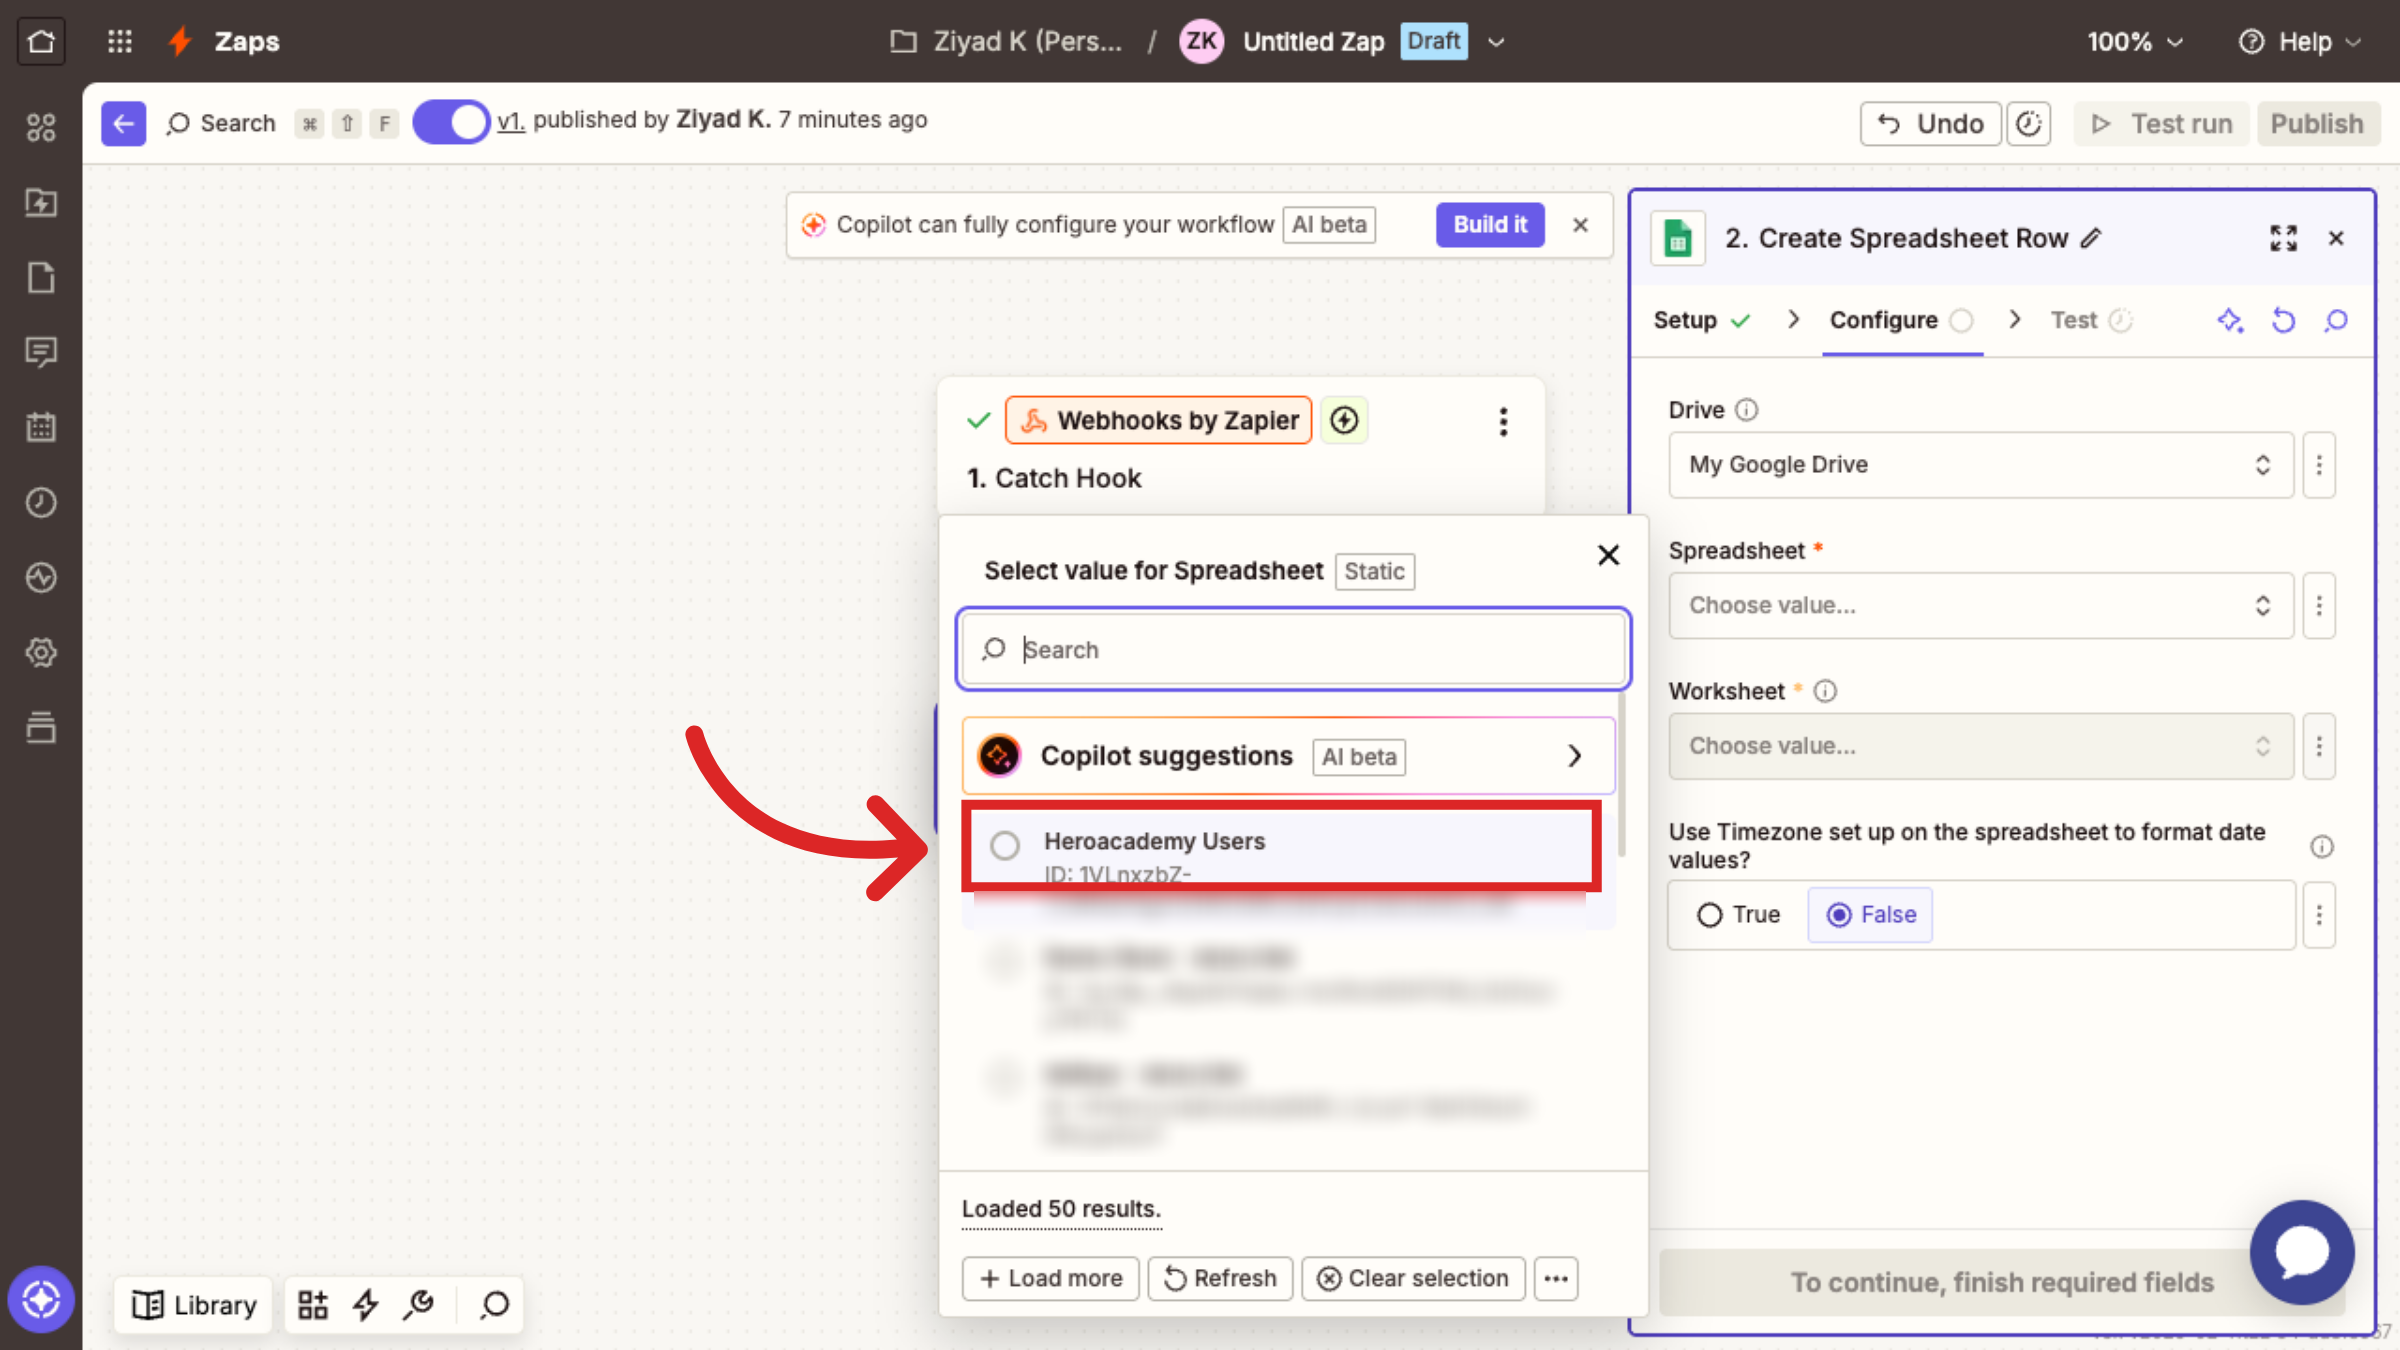
Select your worksheet in the spreadsheet.
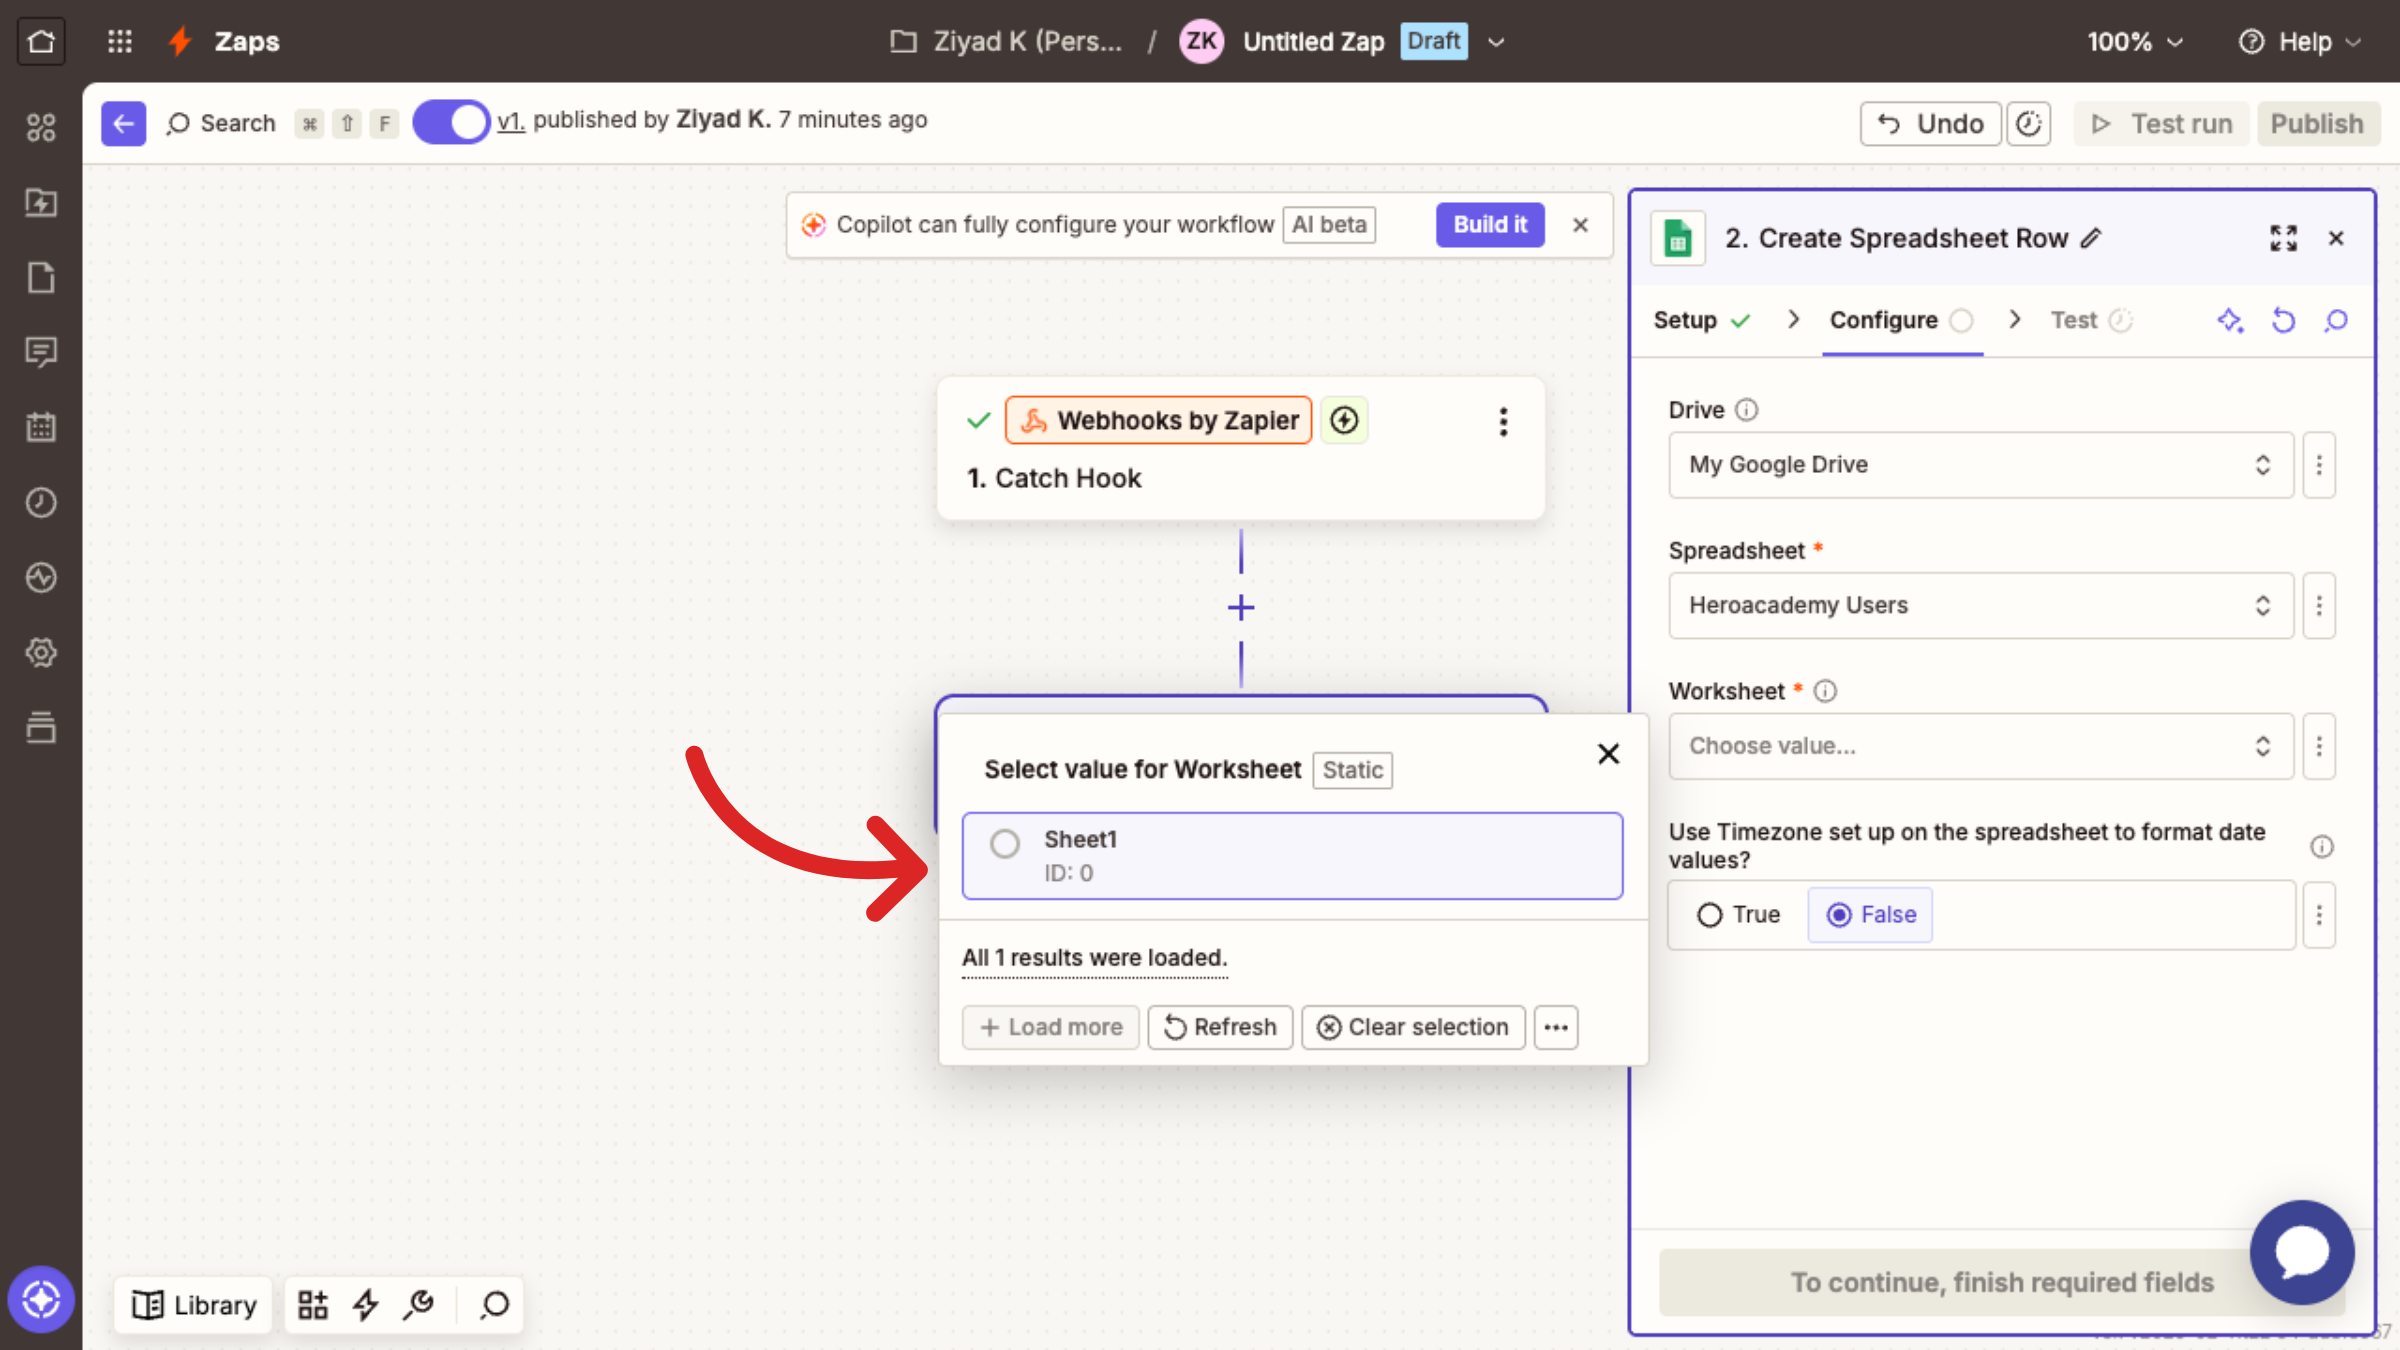
Map each column header in the sheet to the corresponding field from the webhook.
For example, map the “Customer Name” field from the webhook to the “Name” column in the sheet.
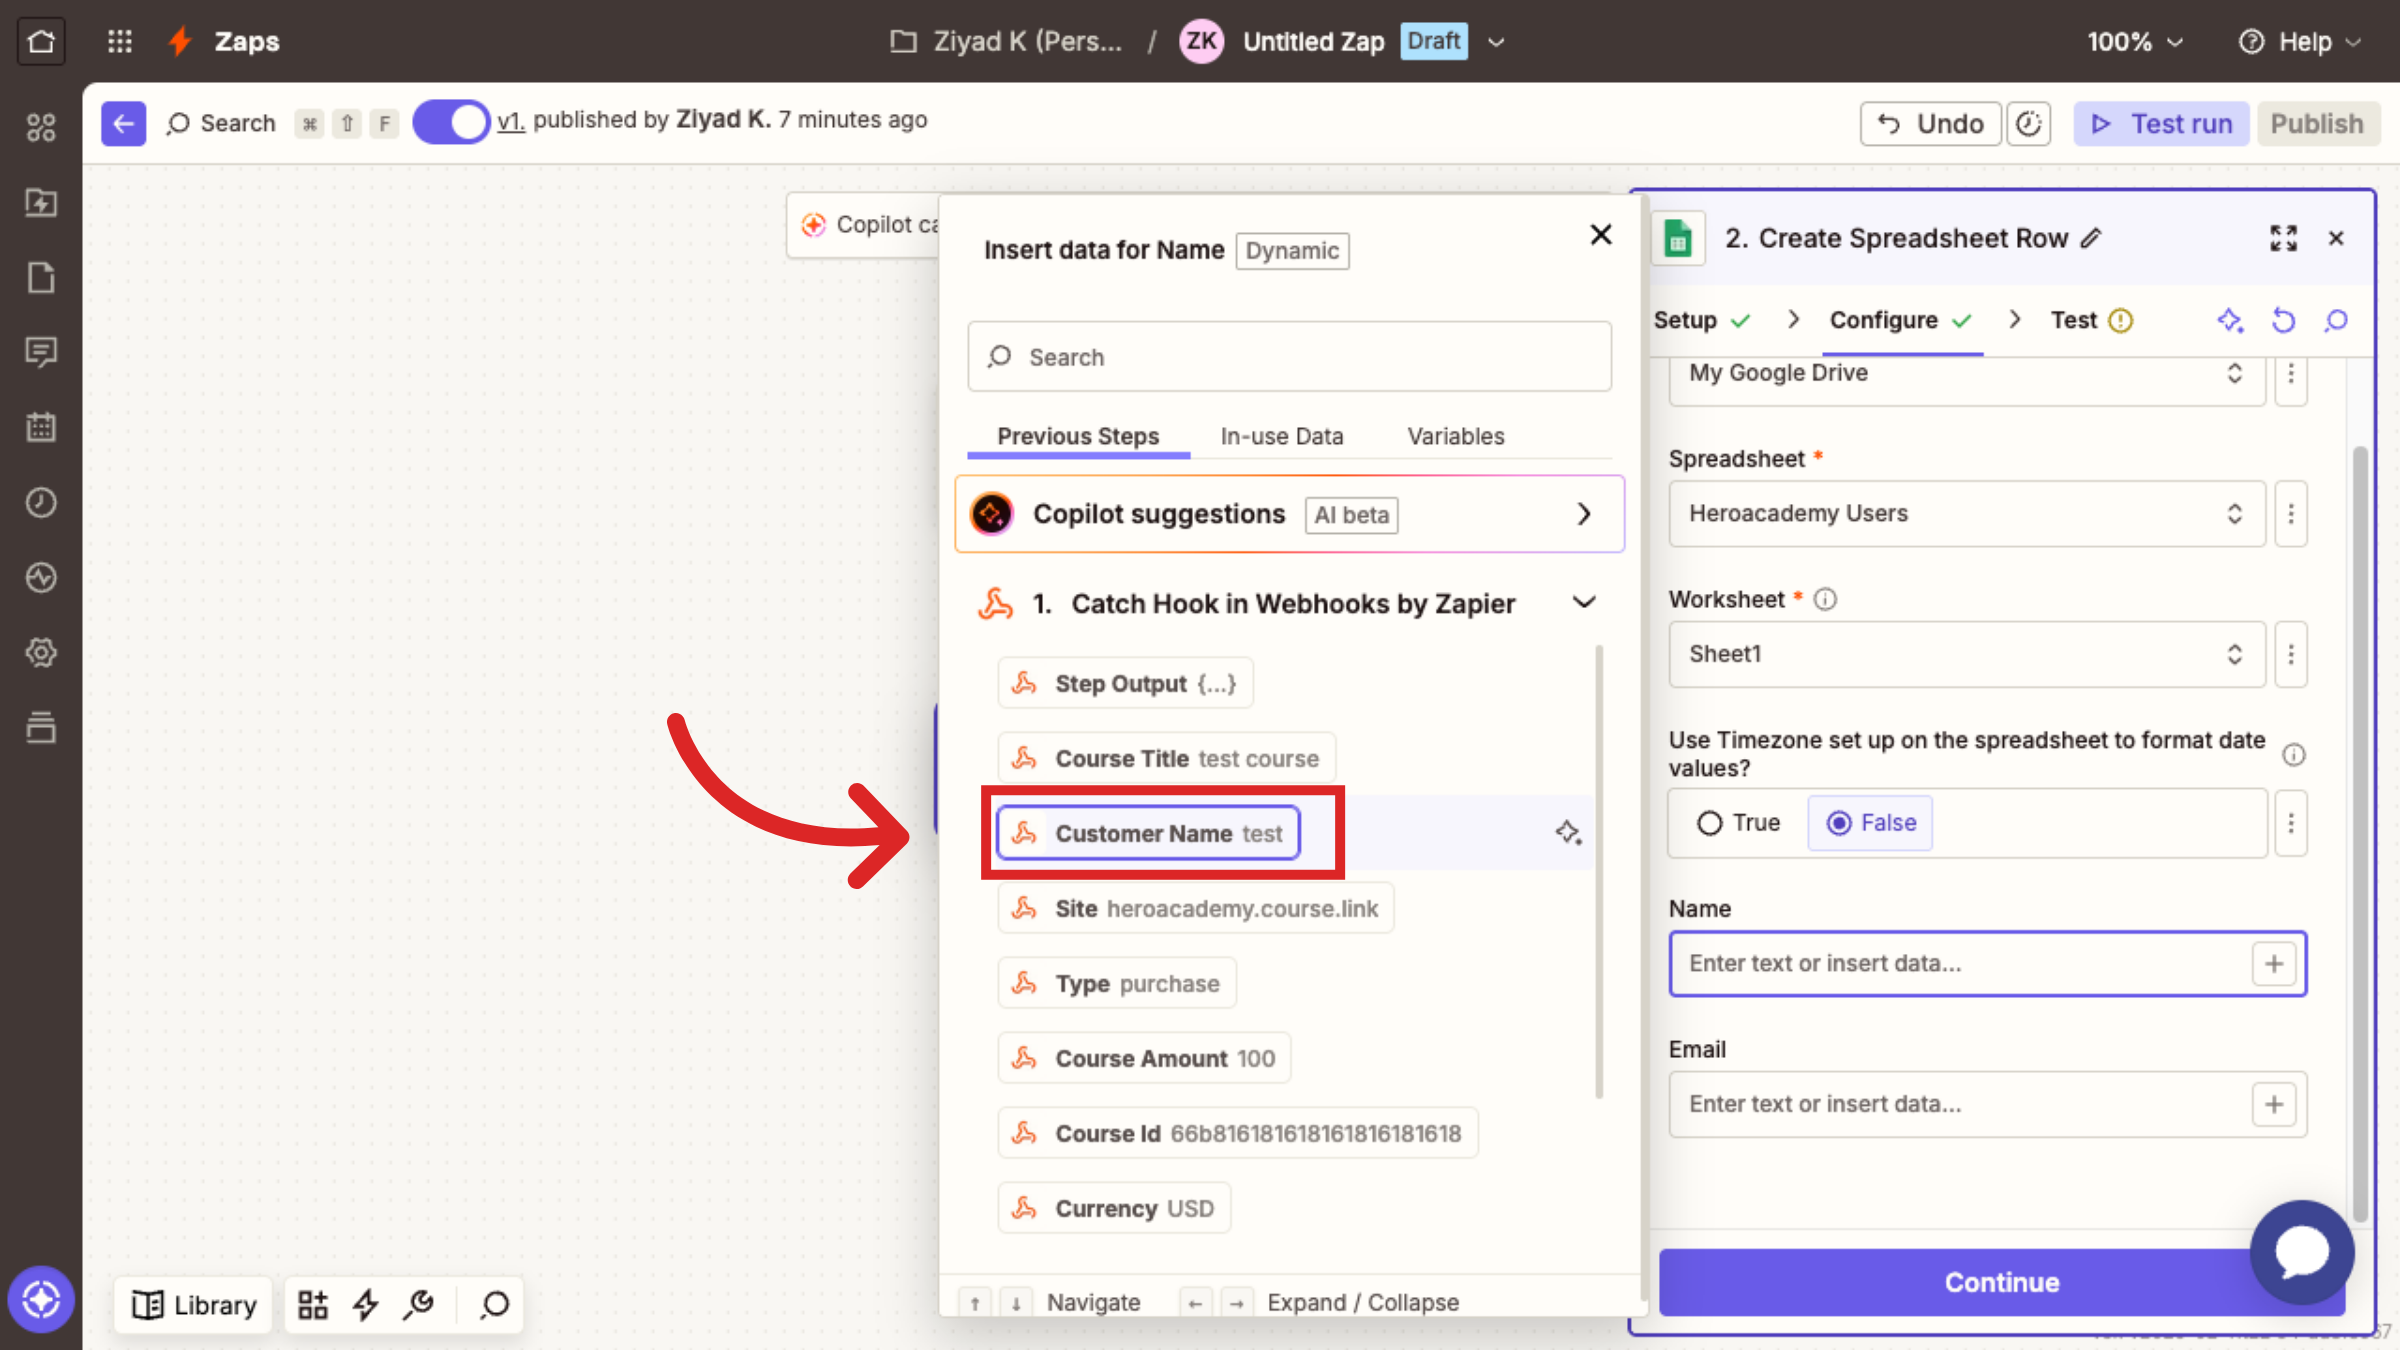
Click Continue to save your field mappings and proceed to testing the Zap.

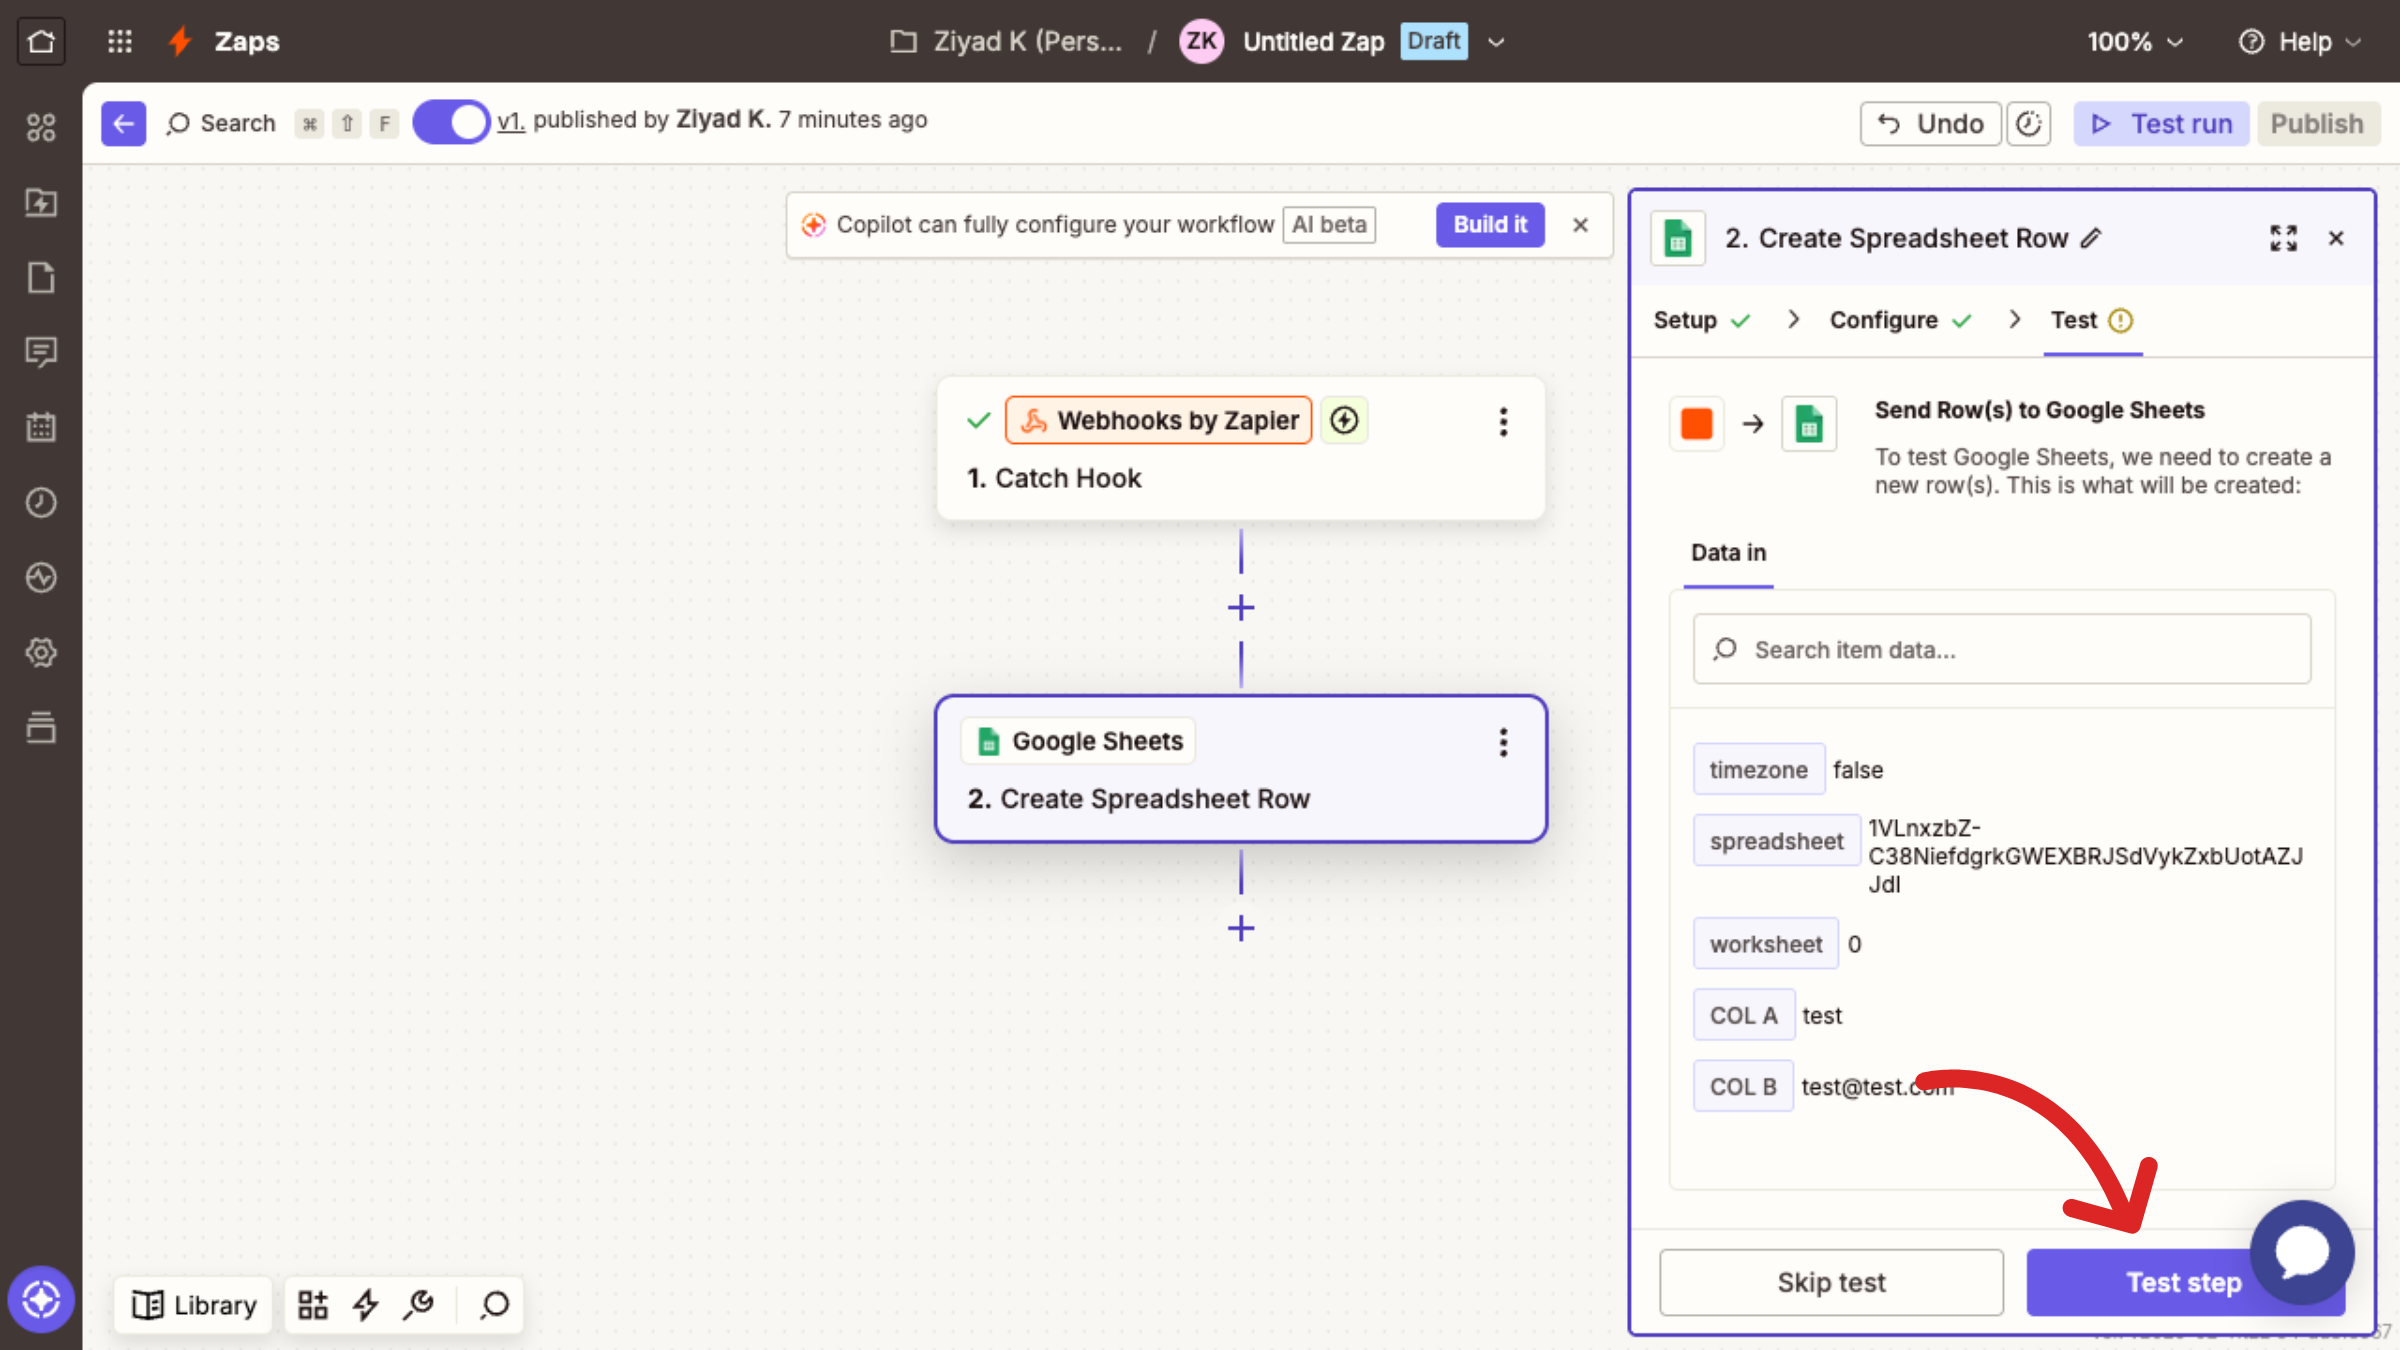
Click Test step to run a test and verify that the Zap is configured correctly.
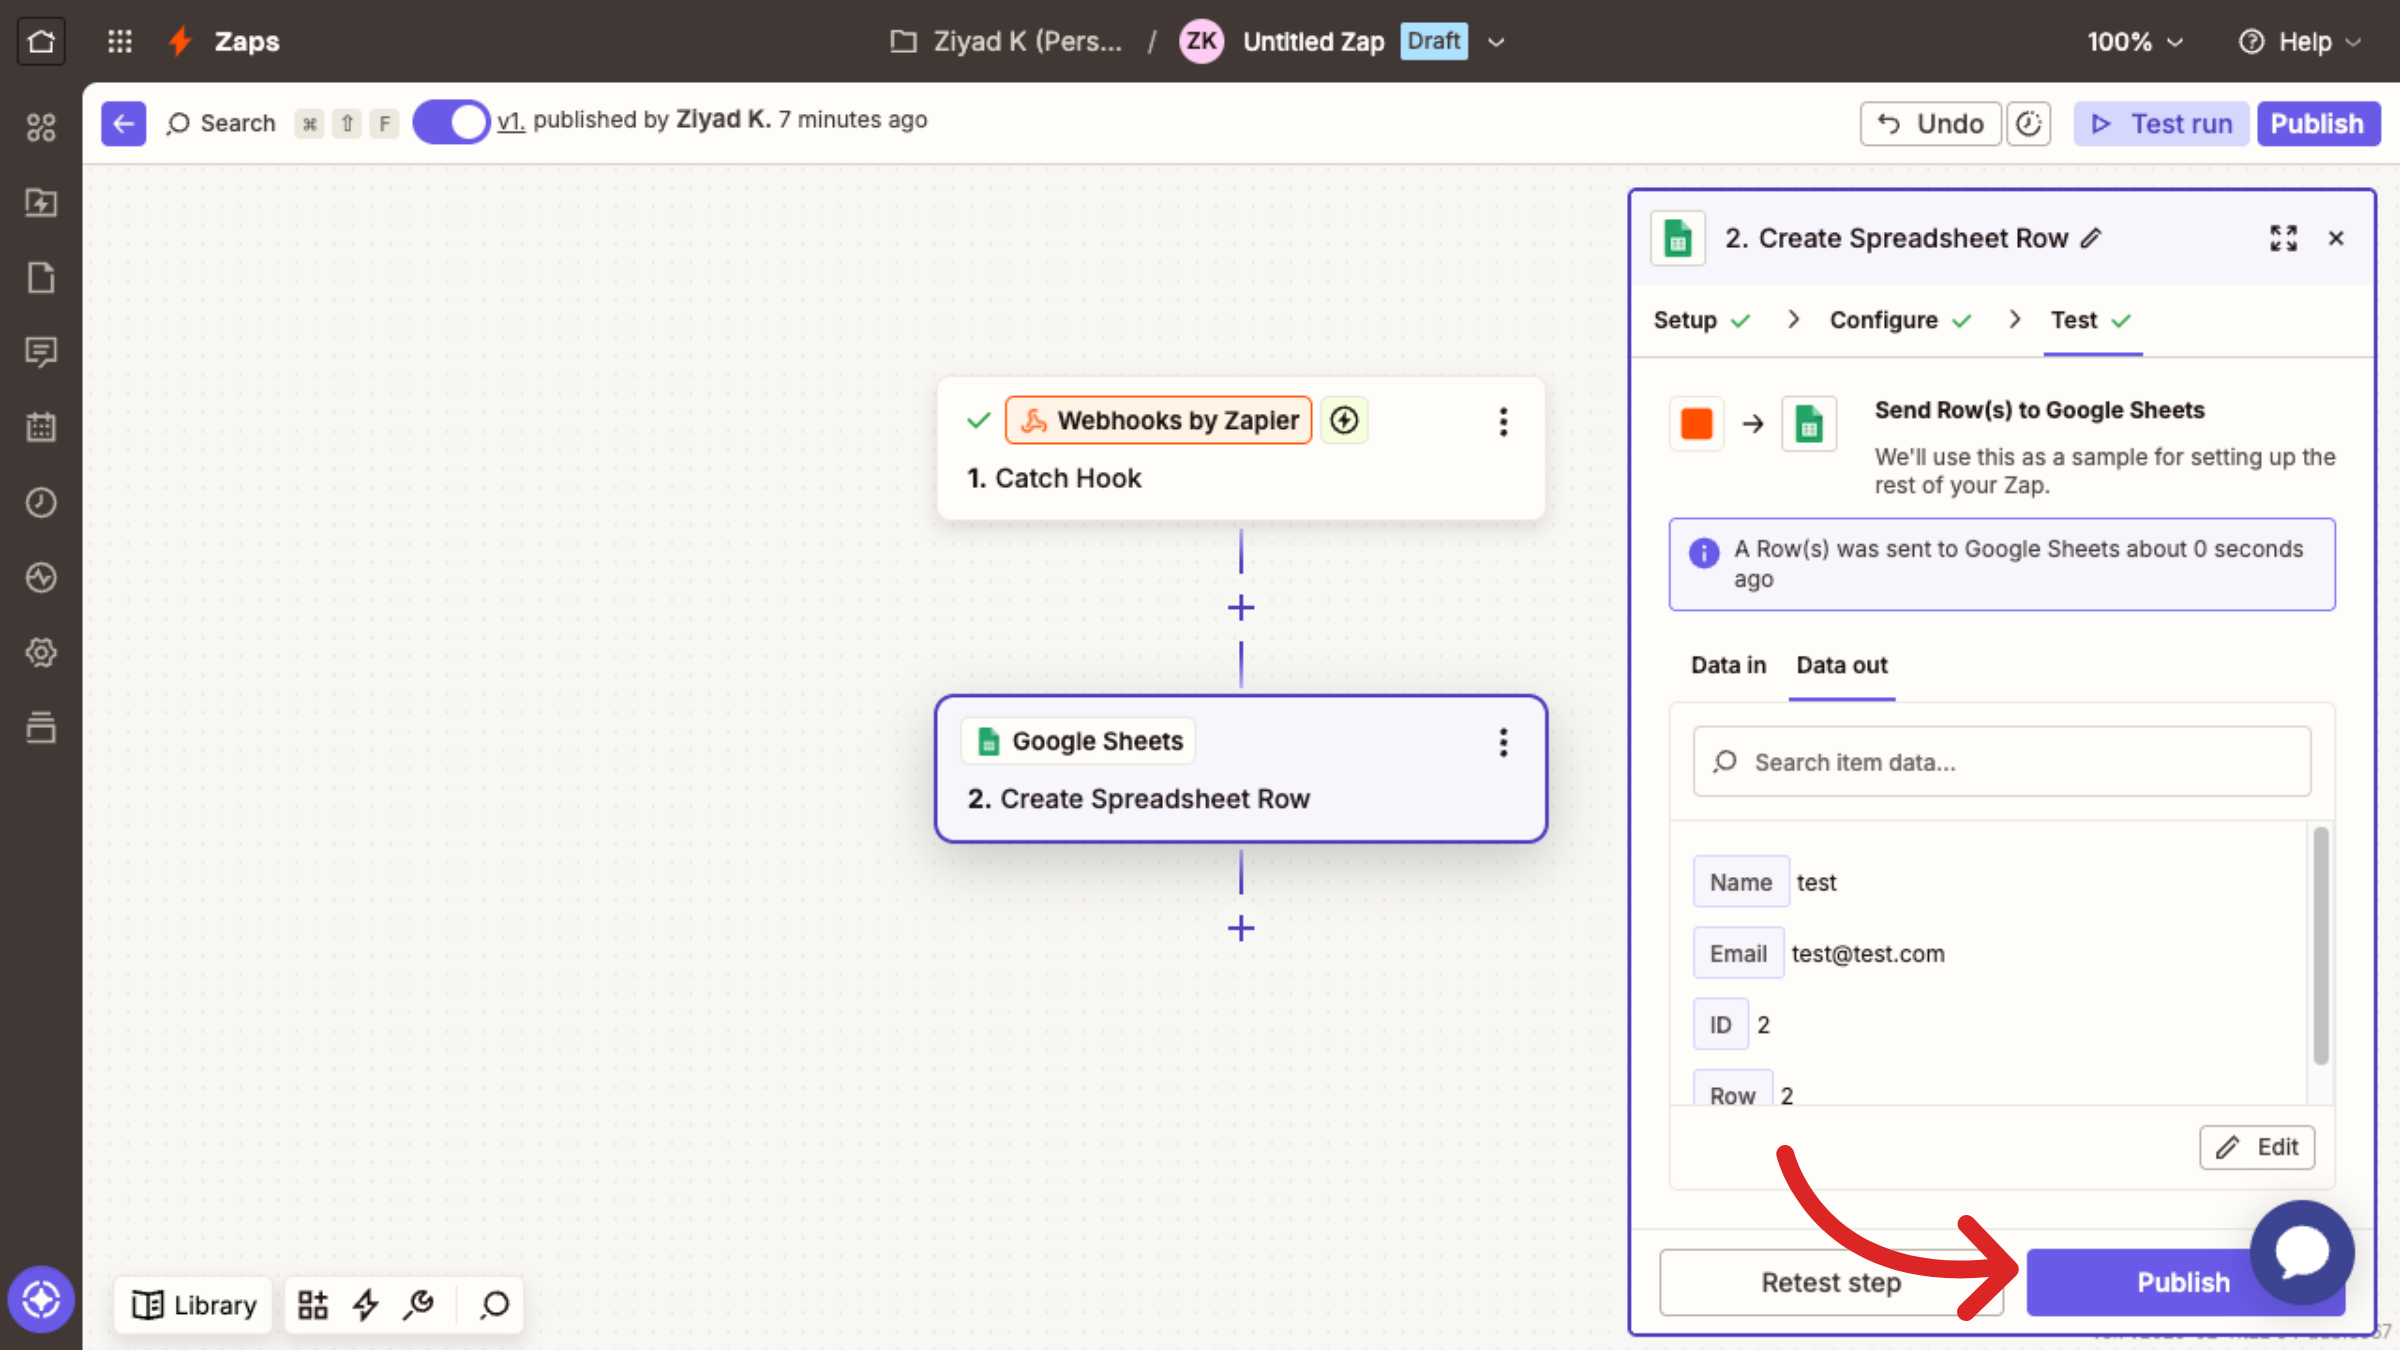
Click Publish to make your Zap active and start automating your workflow.
Test Your Integration
Register a new user or purchase a course in your academy, then check your Google Sheet.
A new row should appear automatically with the student or purchase details, based on how you’ve set it up.
Still need help?
Contact us